Introduction
At DETL, we specialize in crafting stellar software applications that seamlessly blend hardcore engineering with sleek design. Our mission is to deliver both mobile and web applications that provide exceptional user experiences without compromising on aesthetics or functionality. In this blog post, we will guide you through how to implement advanced Voice Recognition in your React Native application.
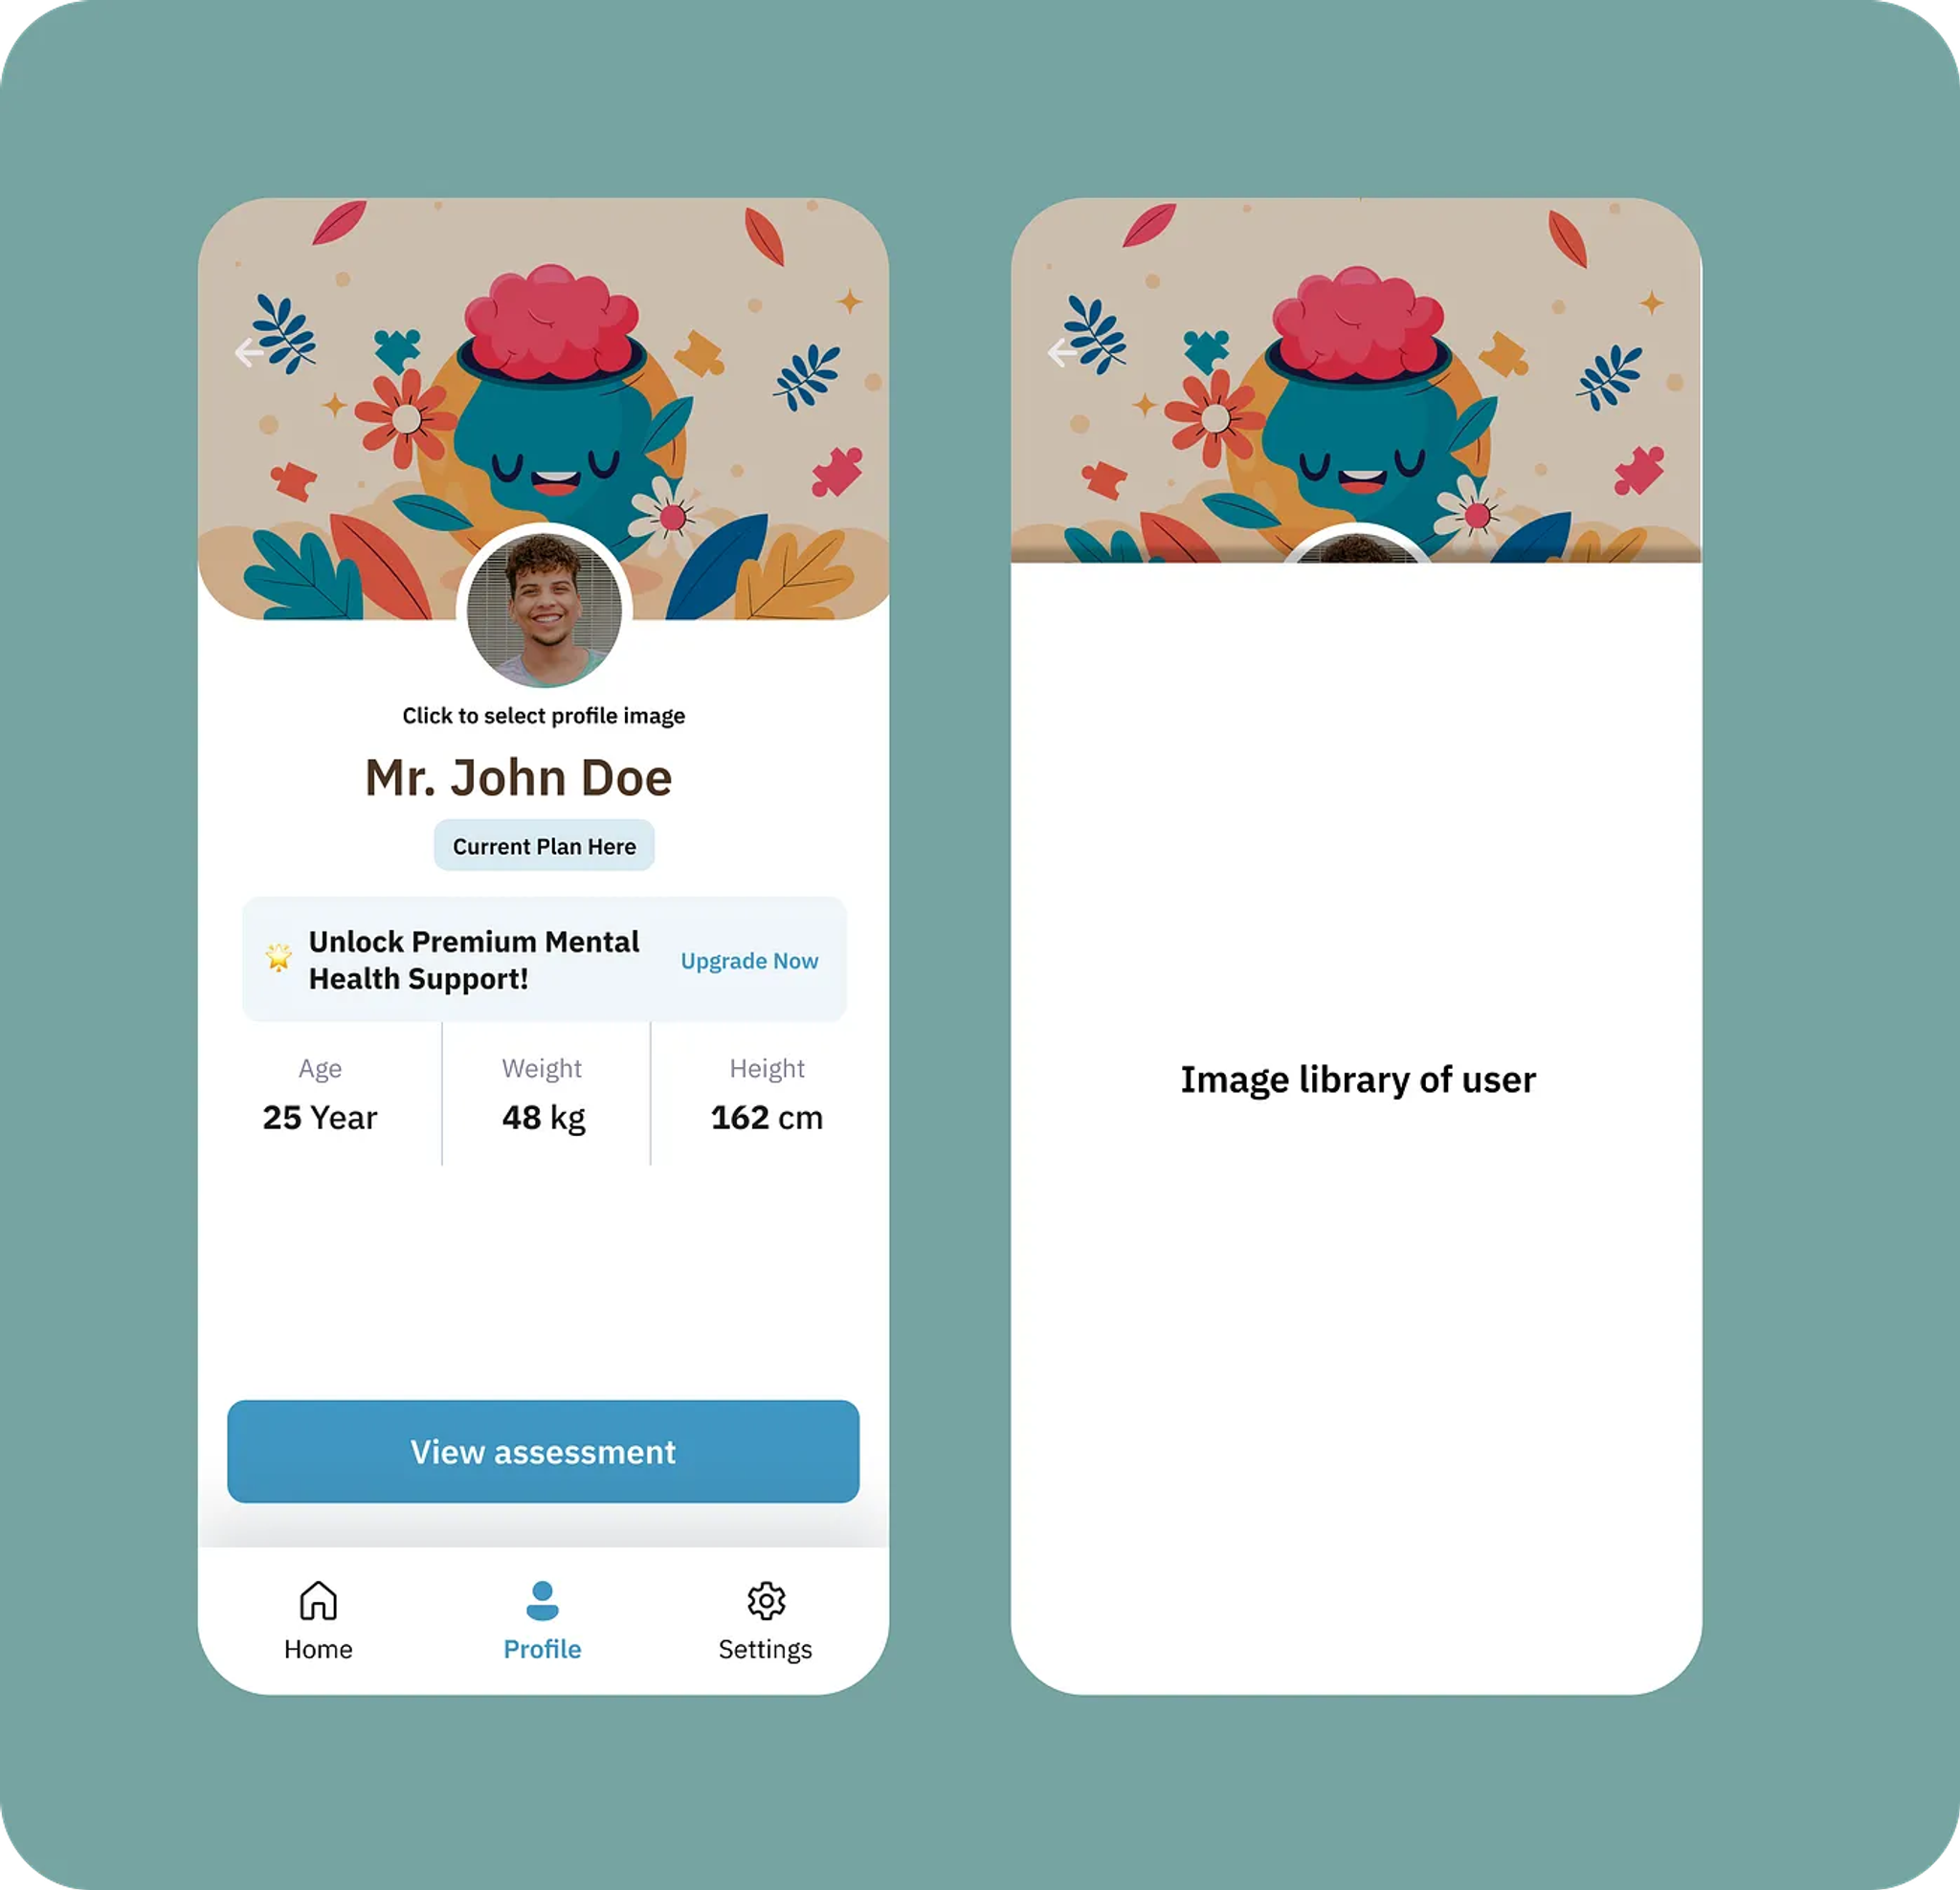
DETL has been working on an AI application for a client called Psyvatar AI which is due to be released in the next upcoming weeks from today’s writing (October 11, 2024).
In our Expo React Native application, we’ve developed a sophisticated voice recognition system that goes beyond traditional recording methods. In this blog post, I will walk you through our uniqie approach to audio detection and recording.
The Challenge of Intelligent Voice Recognition
Traditional voice recognition often relies on manual start and stop recording buttons. Our goal was to create a more natural, seamless experience where the app could:
- Automatically detect when a user starts speaking
- Distinguish between background noise vs actual speech
- Manage recording with constant user intervention
This implementation is very close to chatGPT’s voice recognition implementation, however, this implementation could be drastically improved. As example, you could implement the following in addition to this voice recognition:
- A button that allows you to evaluate the noise level both without and with speech to enable the voice recognition system to adapt to different environment, both loud and quiet environments.
- Reduce the latency between when the system recognises that the user is speaking to processing the users speech and returning the response to the user through the avatar.
Aside from that, below you’ll find the technical implementation of the voice recognition engine.
The Technical Implementation
The core of our voice recognition lies in continuous sound level monitoring. We use the RNSoundLevel library to capture real-time audio data and analyse the audios characteristics. Our voice recognition begins with the startSession method, you have different connections happening in this function. Mainly:
- WebRTC connection,
- State management and,
- voice recognition initialisation.
Let’s break down the process step by step.
Session Initialisation Workflow
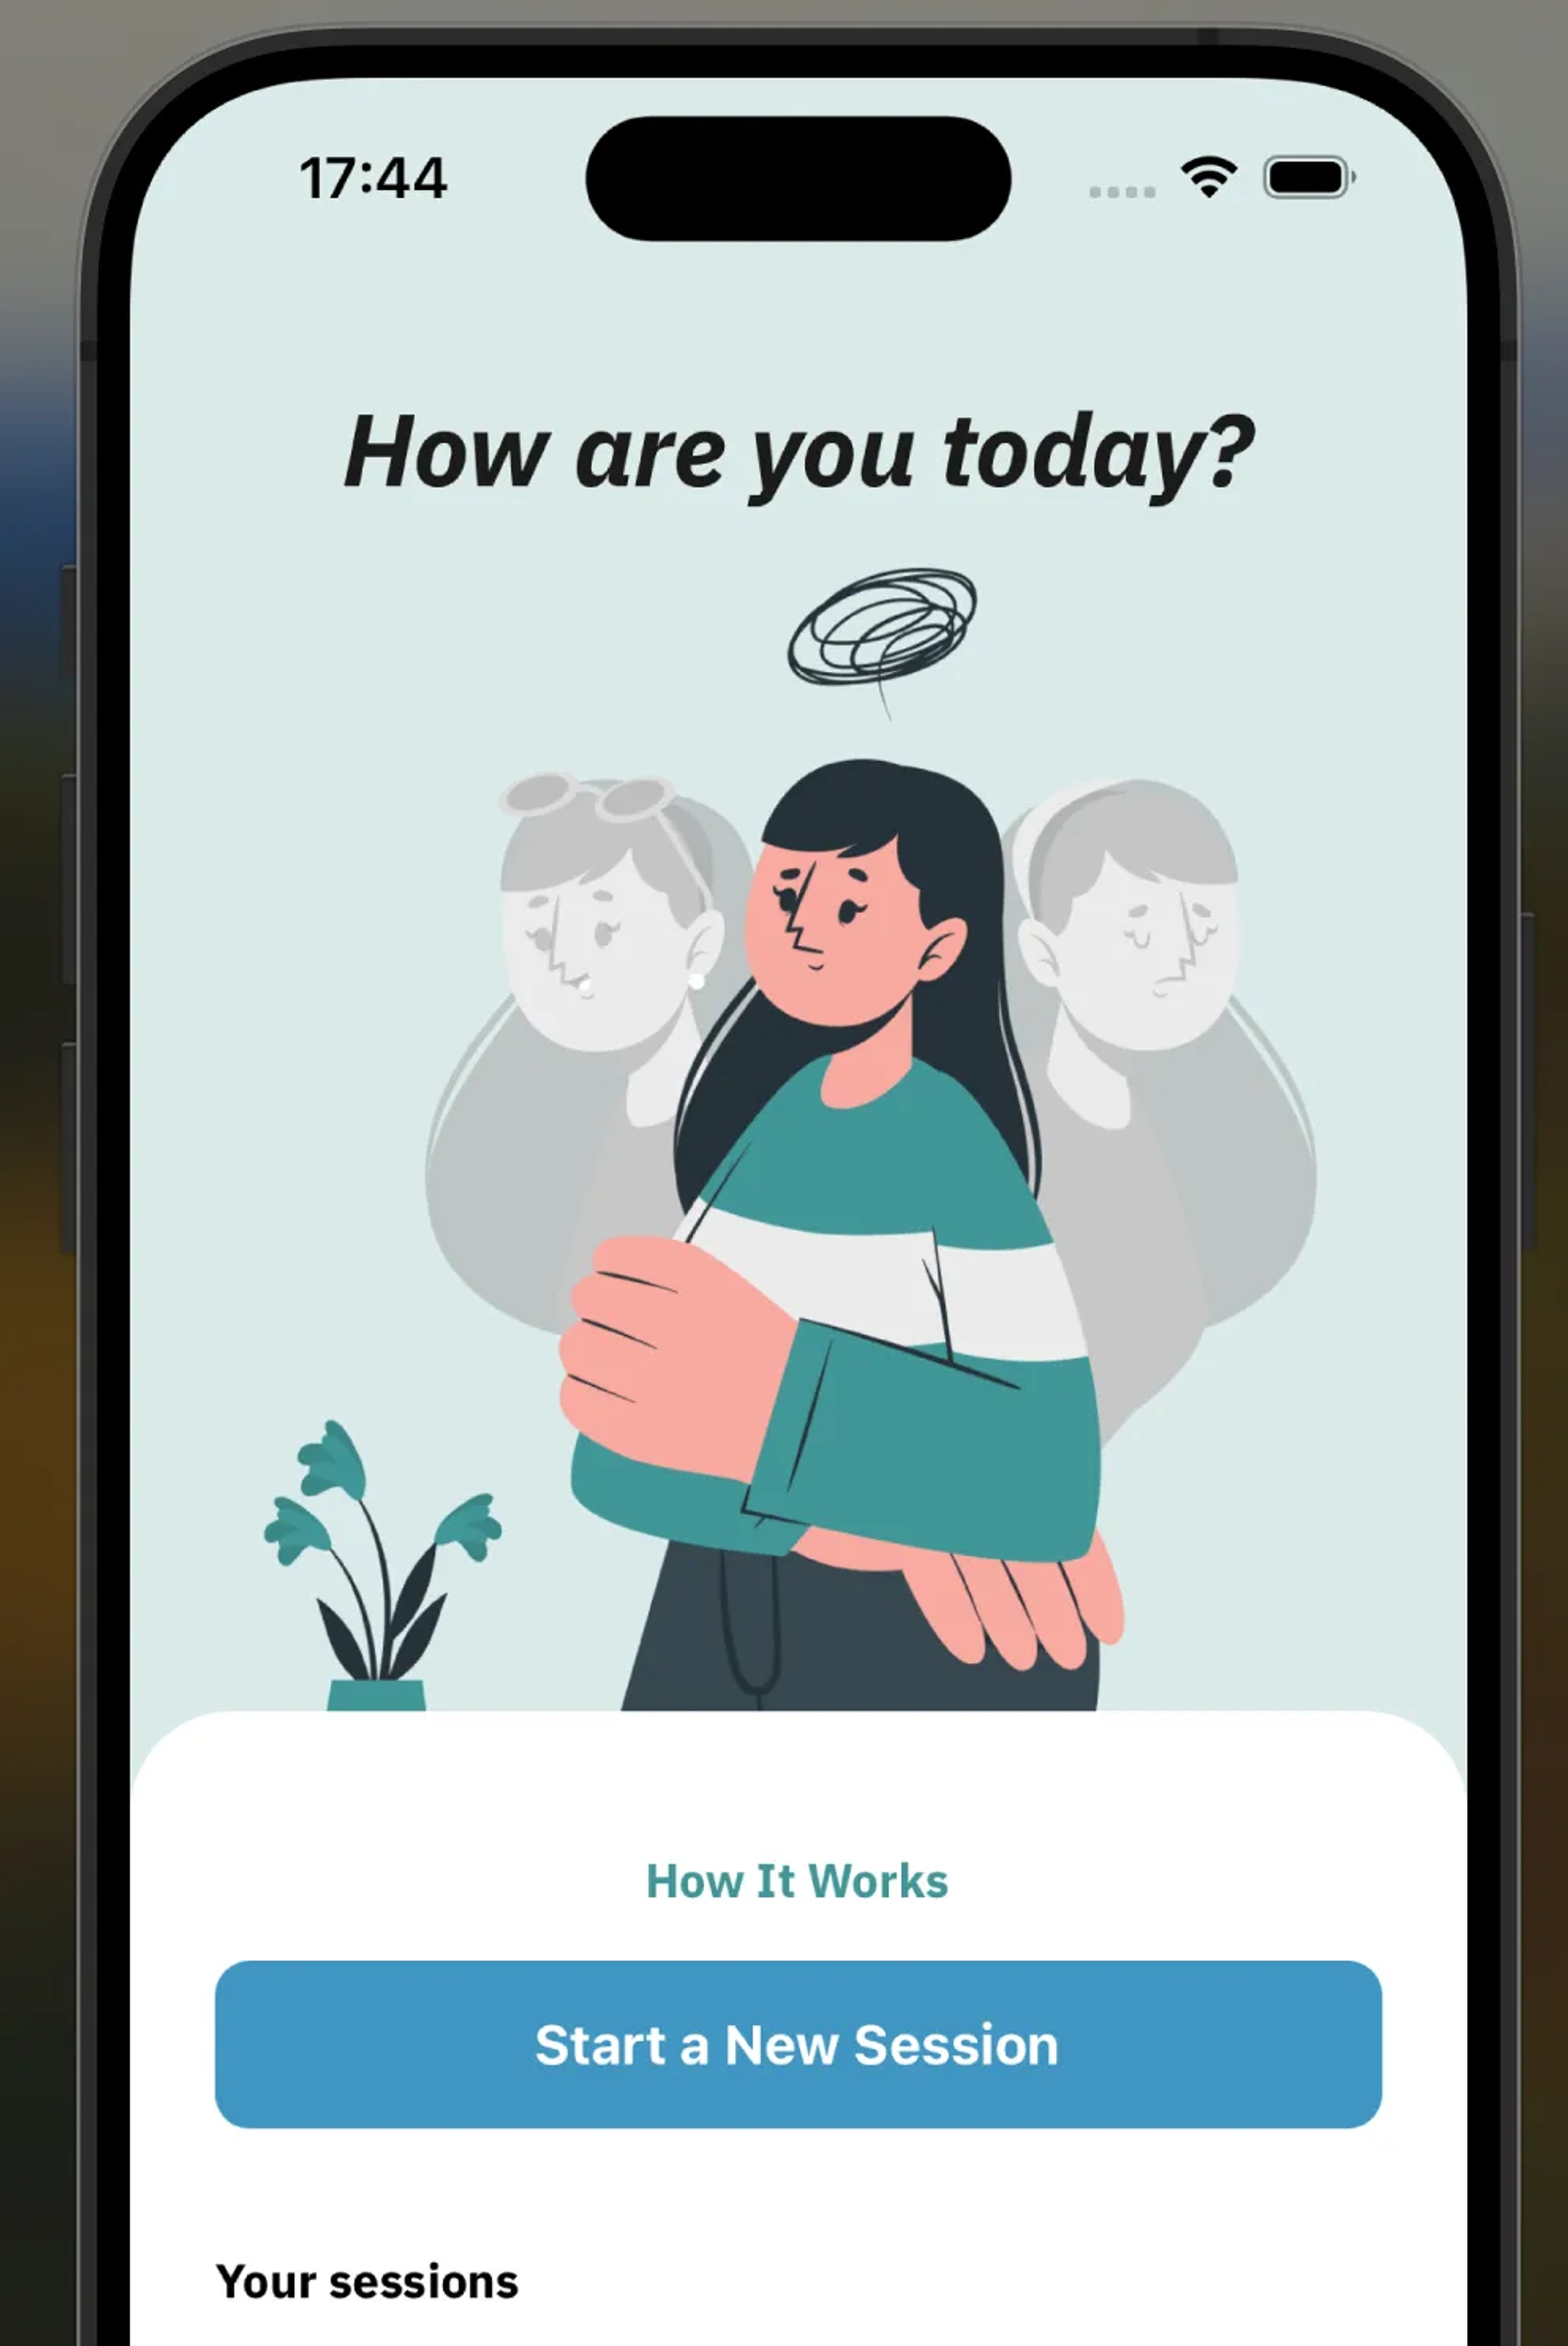
When the user clicks on Start A New Session button, a modal pops up. Within the modal code we have a useEffect hook that runs as the modal is presented. Below is an image on how that UI looks like with the button and the useEffect code.
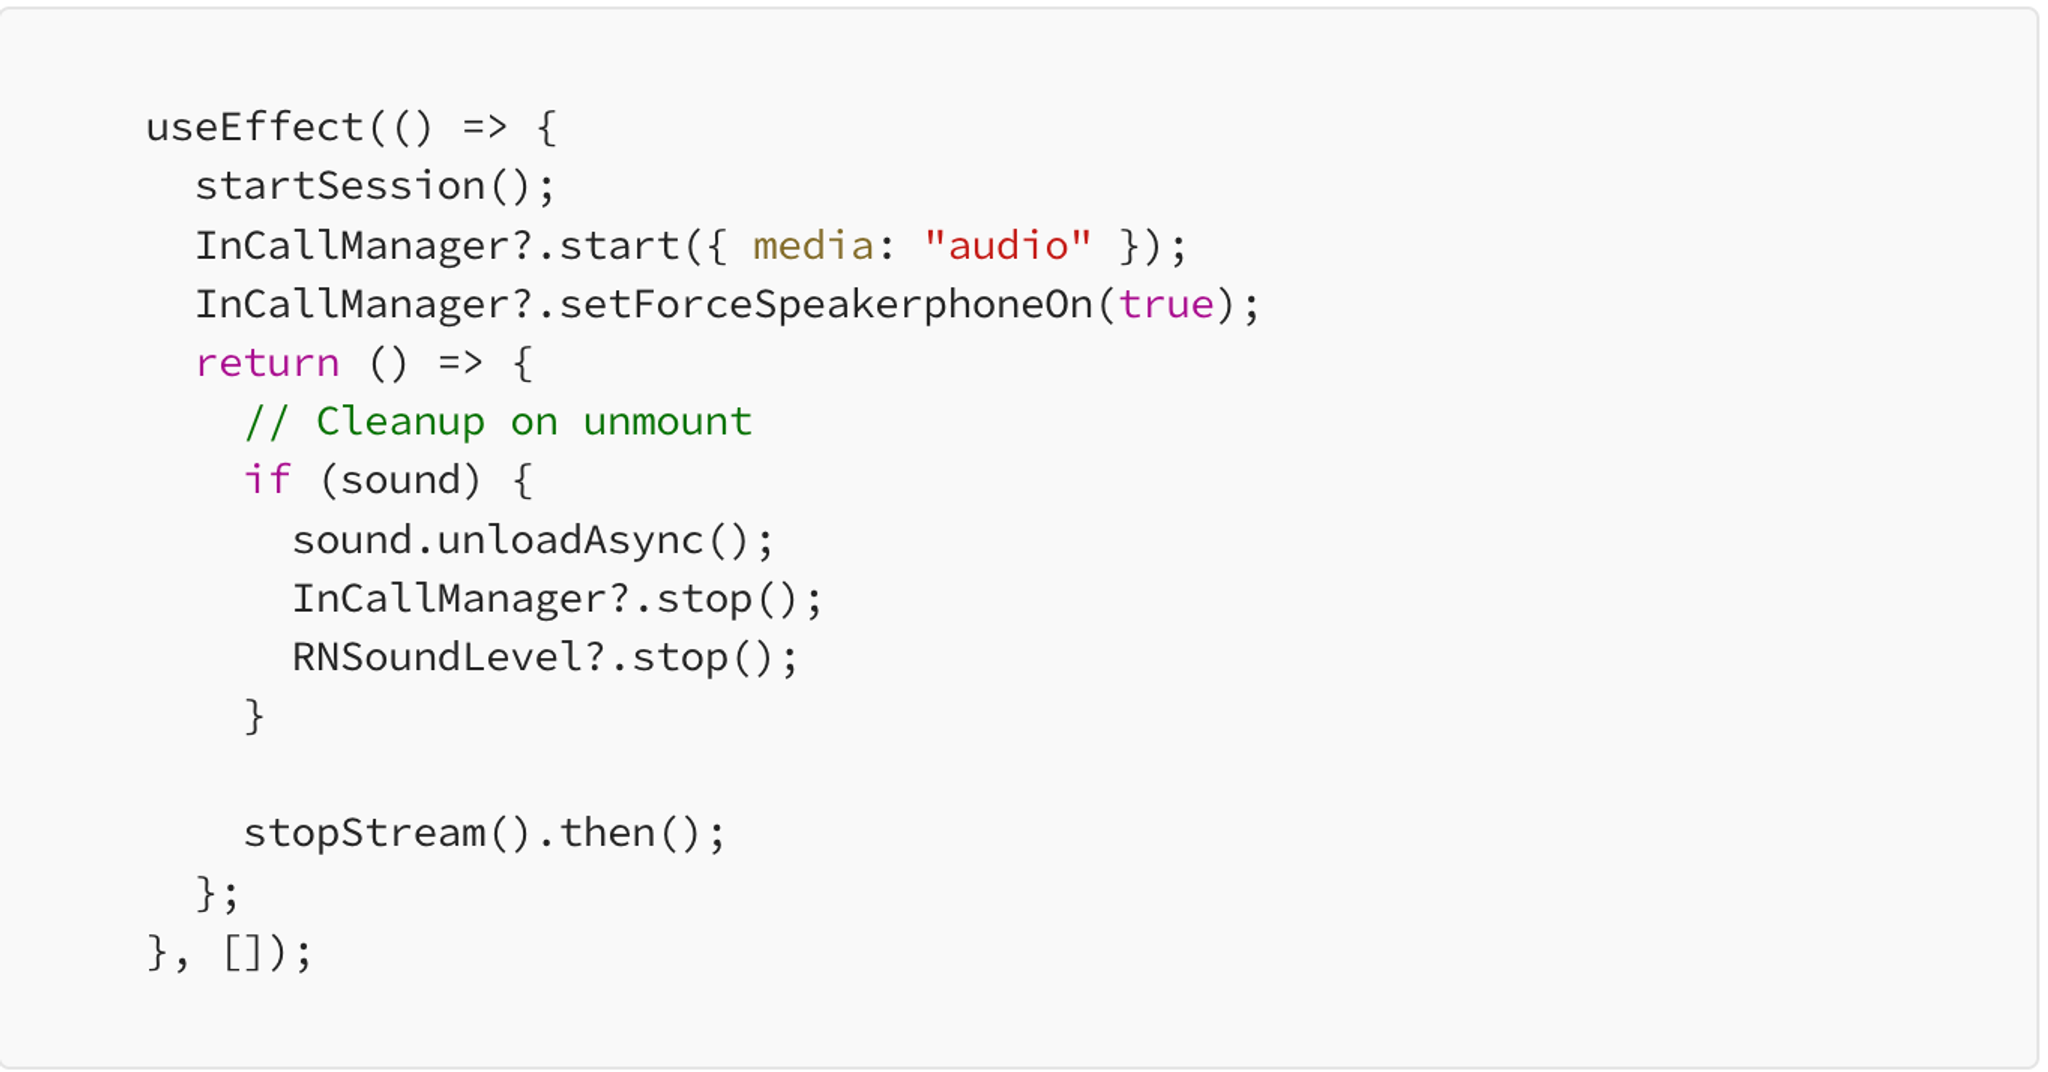
As you can see from the above code, startSession is called inside the useEffect hook when the session screen appears. This then leads it into the following code: startSession code.
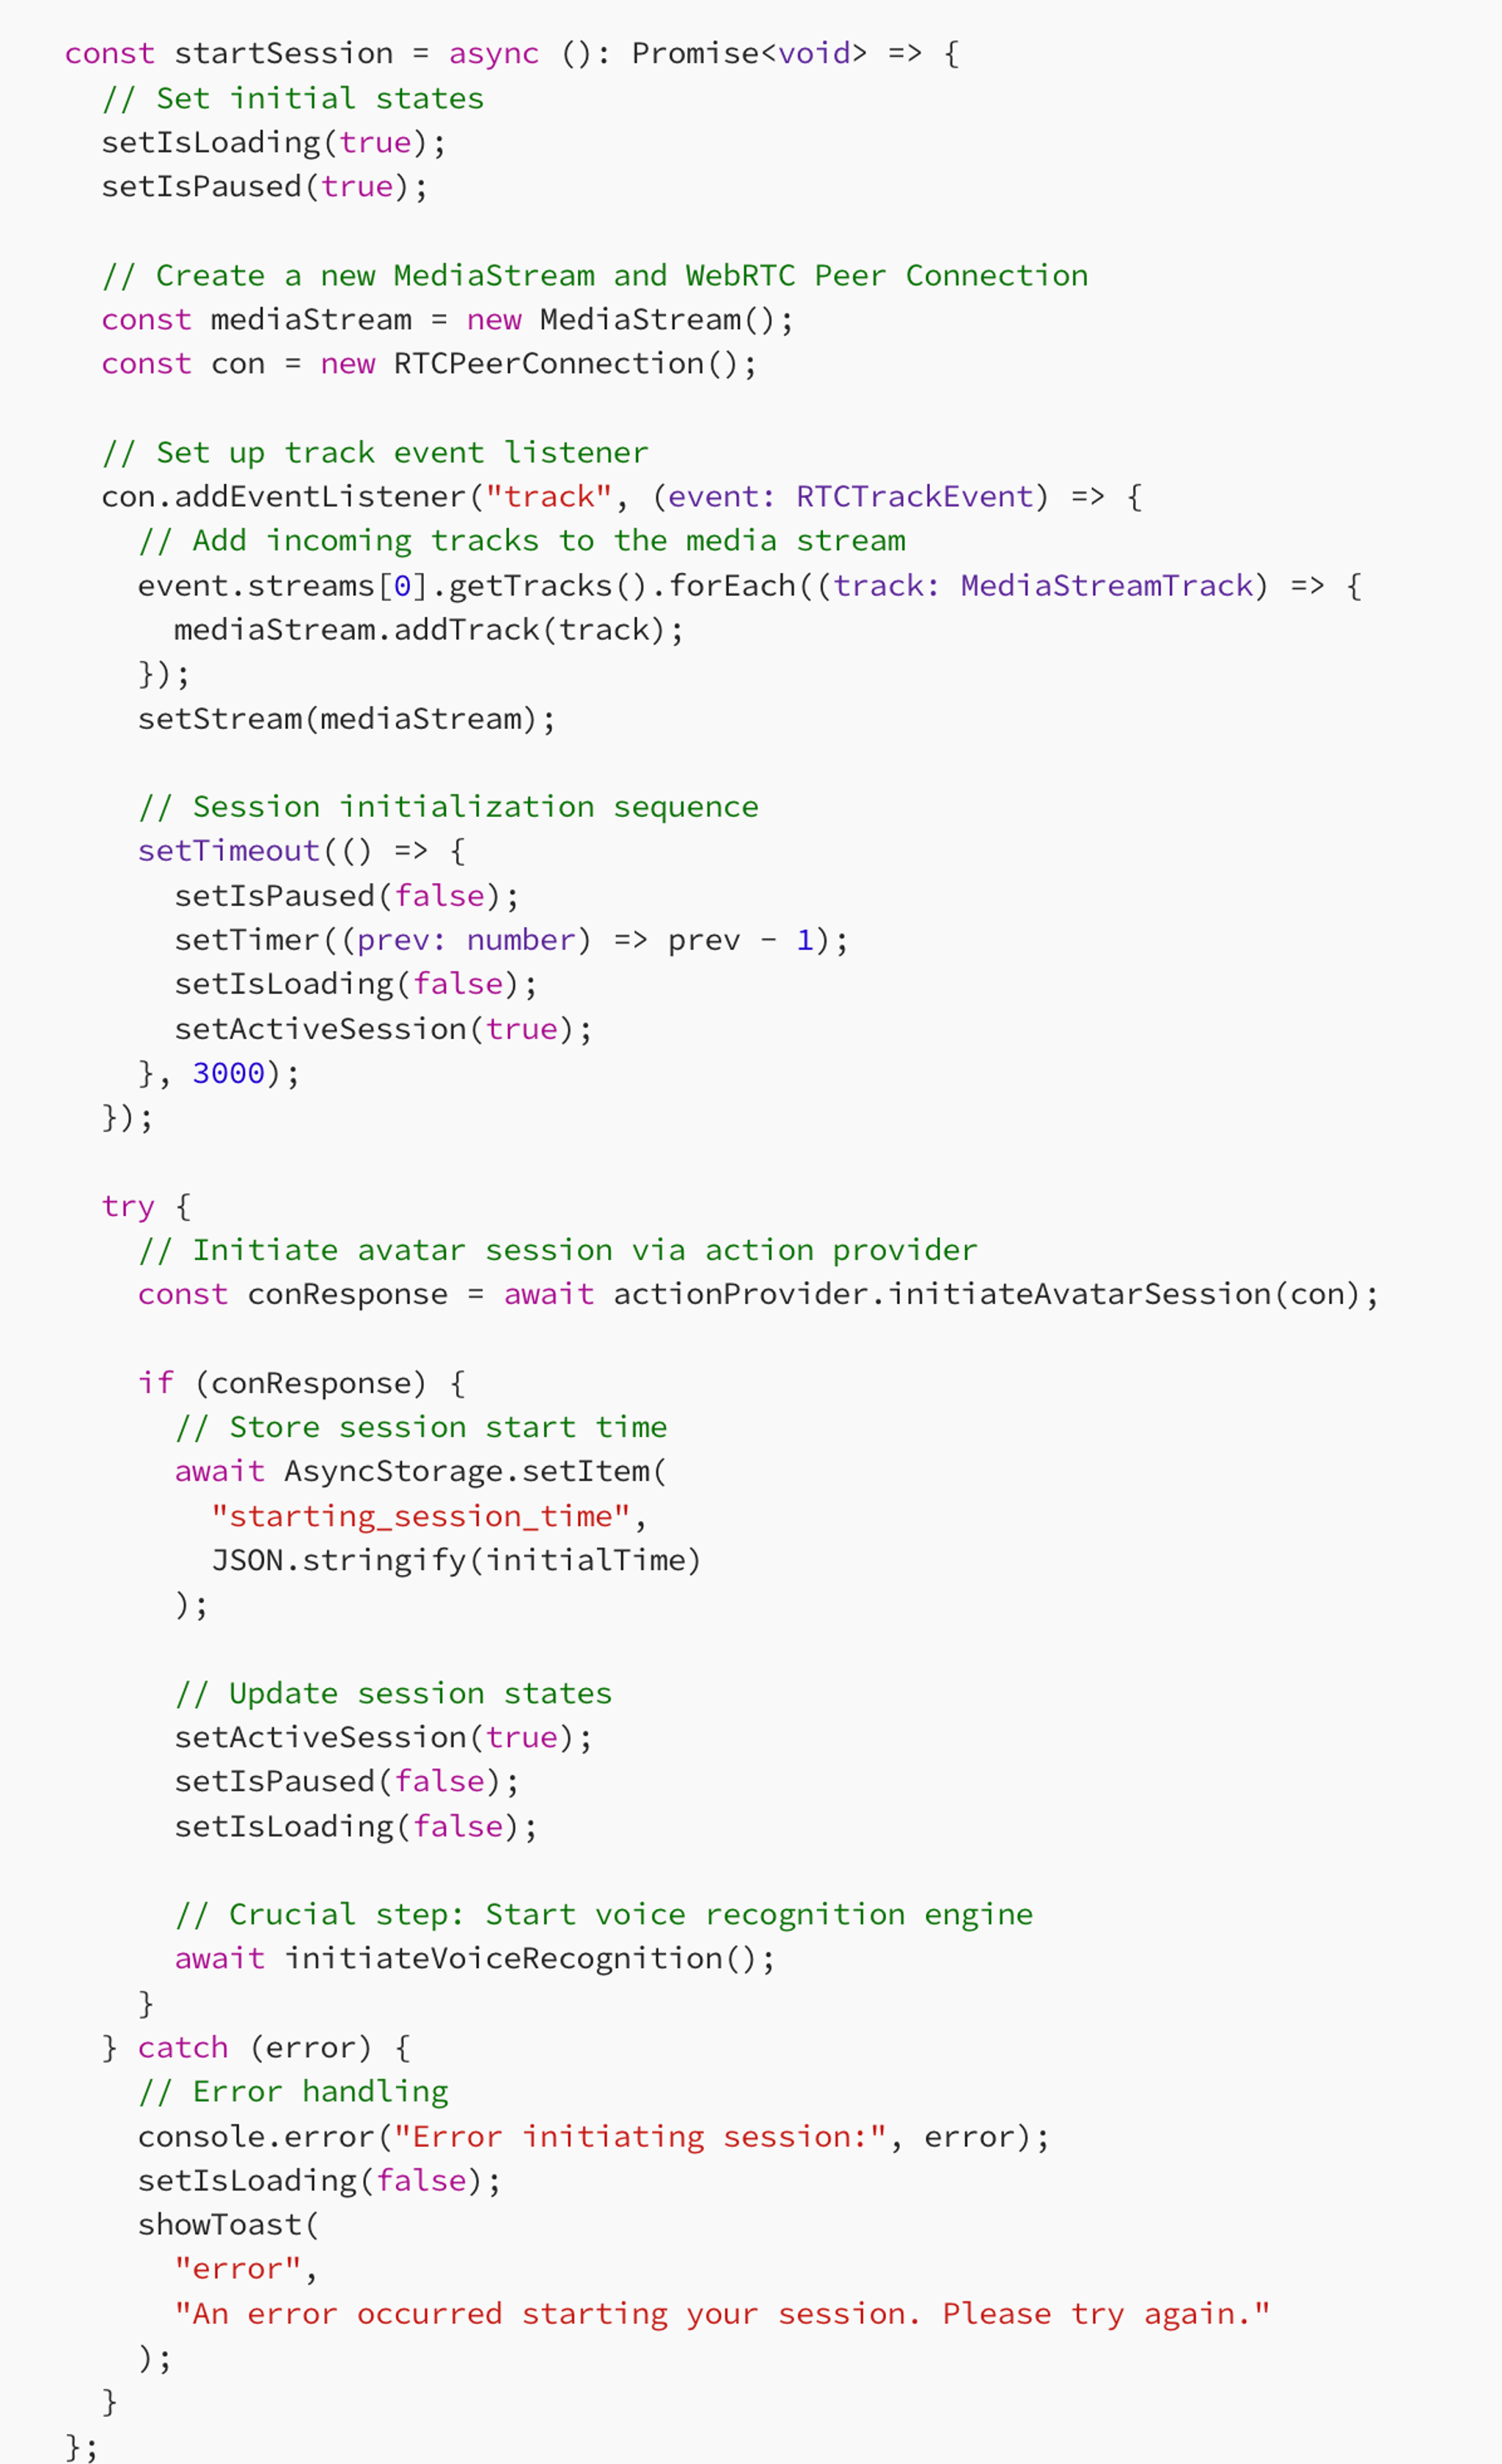
From the above startSession code, you can see that we run two functions. The startSession function is an asynchronous function, so all the functions within the startSession function are being called one after the other since we are using await. We are mainly concerned with the initiateVoiceRecognition function. This function sets up a continuous audio monitoring.
Important Point To Raise
There is a very important point to raise, when implementing voice recognition. We needed to use a state management approach in order to switch between speaking = true and speaking = false . We realised that using useState is too slow in order to switch between these two booleans. So we used a lightweight, key-value-based state management within a class.

In this context, data is the public property of the actionProvider class, defined as an object with a default structure of {count:0} . When you use the syntax actionProvider.data["speaking"] = true;, the following is happening:
datais an object that acts as a storage container or a dictionary, allowing you to dynamically add or modify properties at runtime.
The final structure of data after writing the following actionProvider.data["speaking"] = true is shown below.

Moving swiftly on, we leveraged a key-value based approach in order to use it as a state management method.
Moving on…
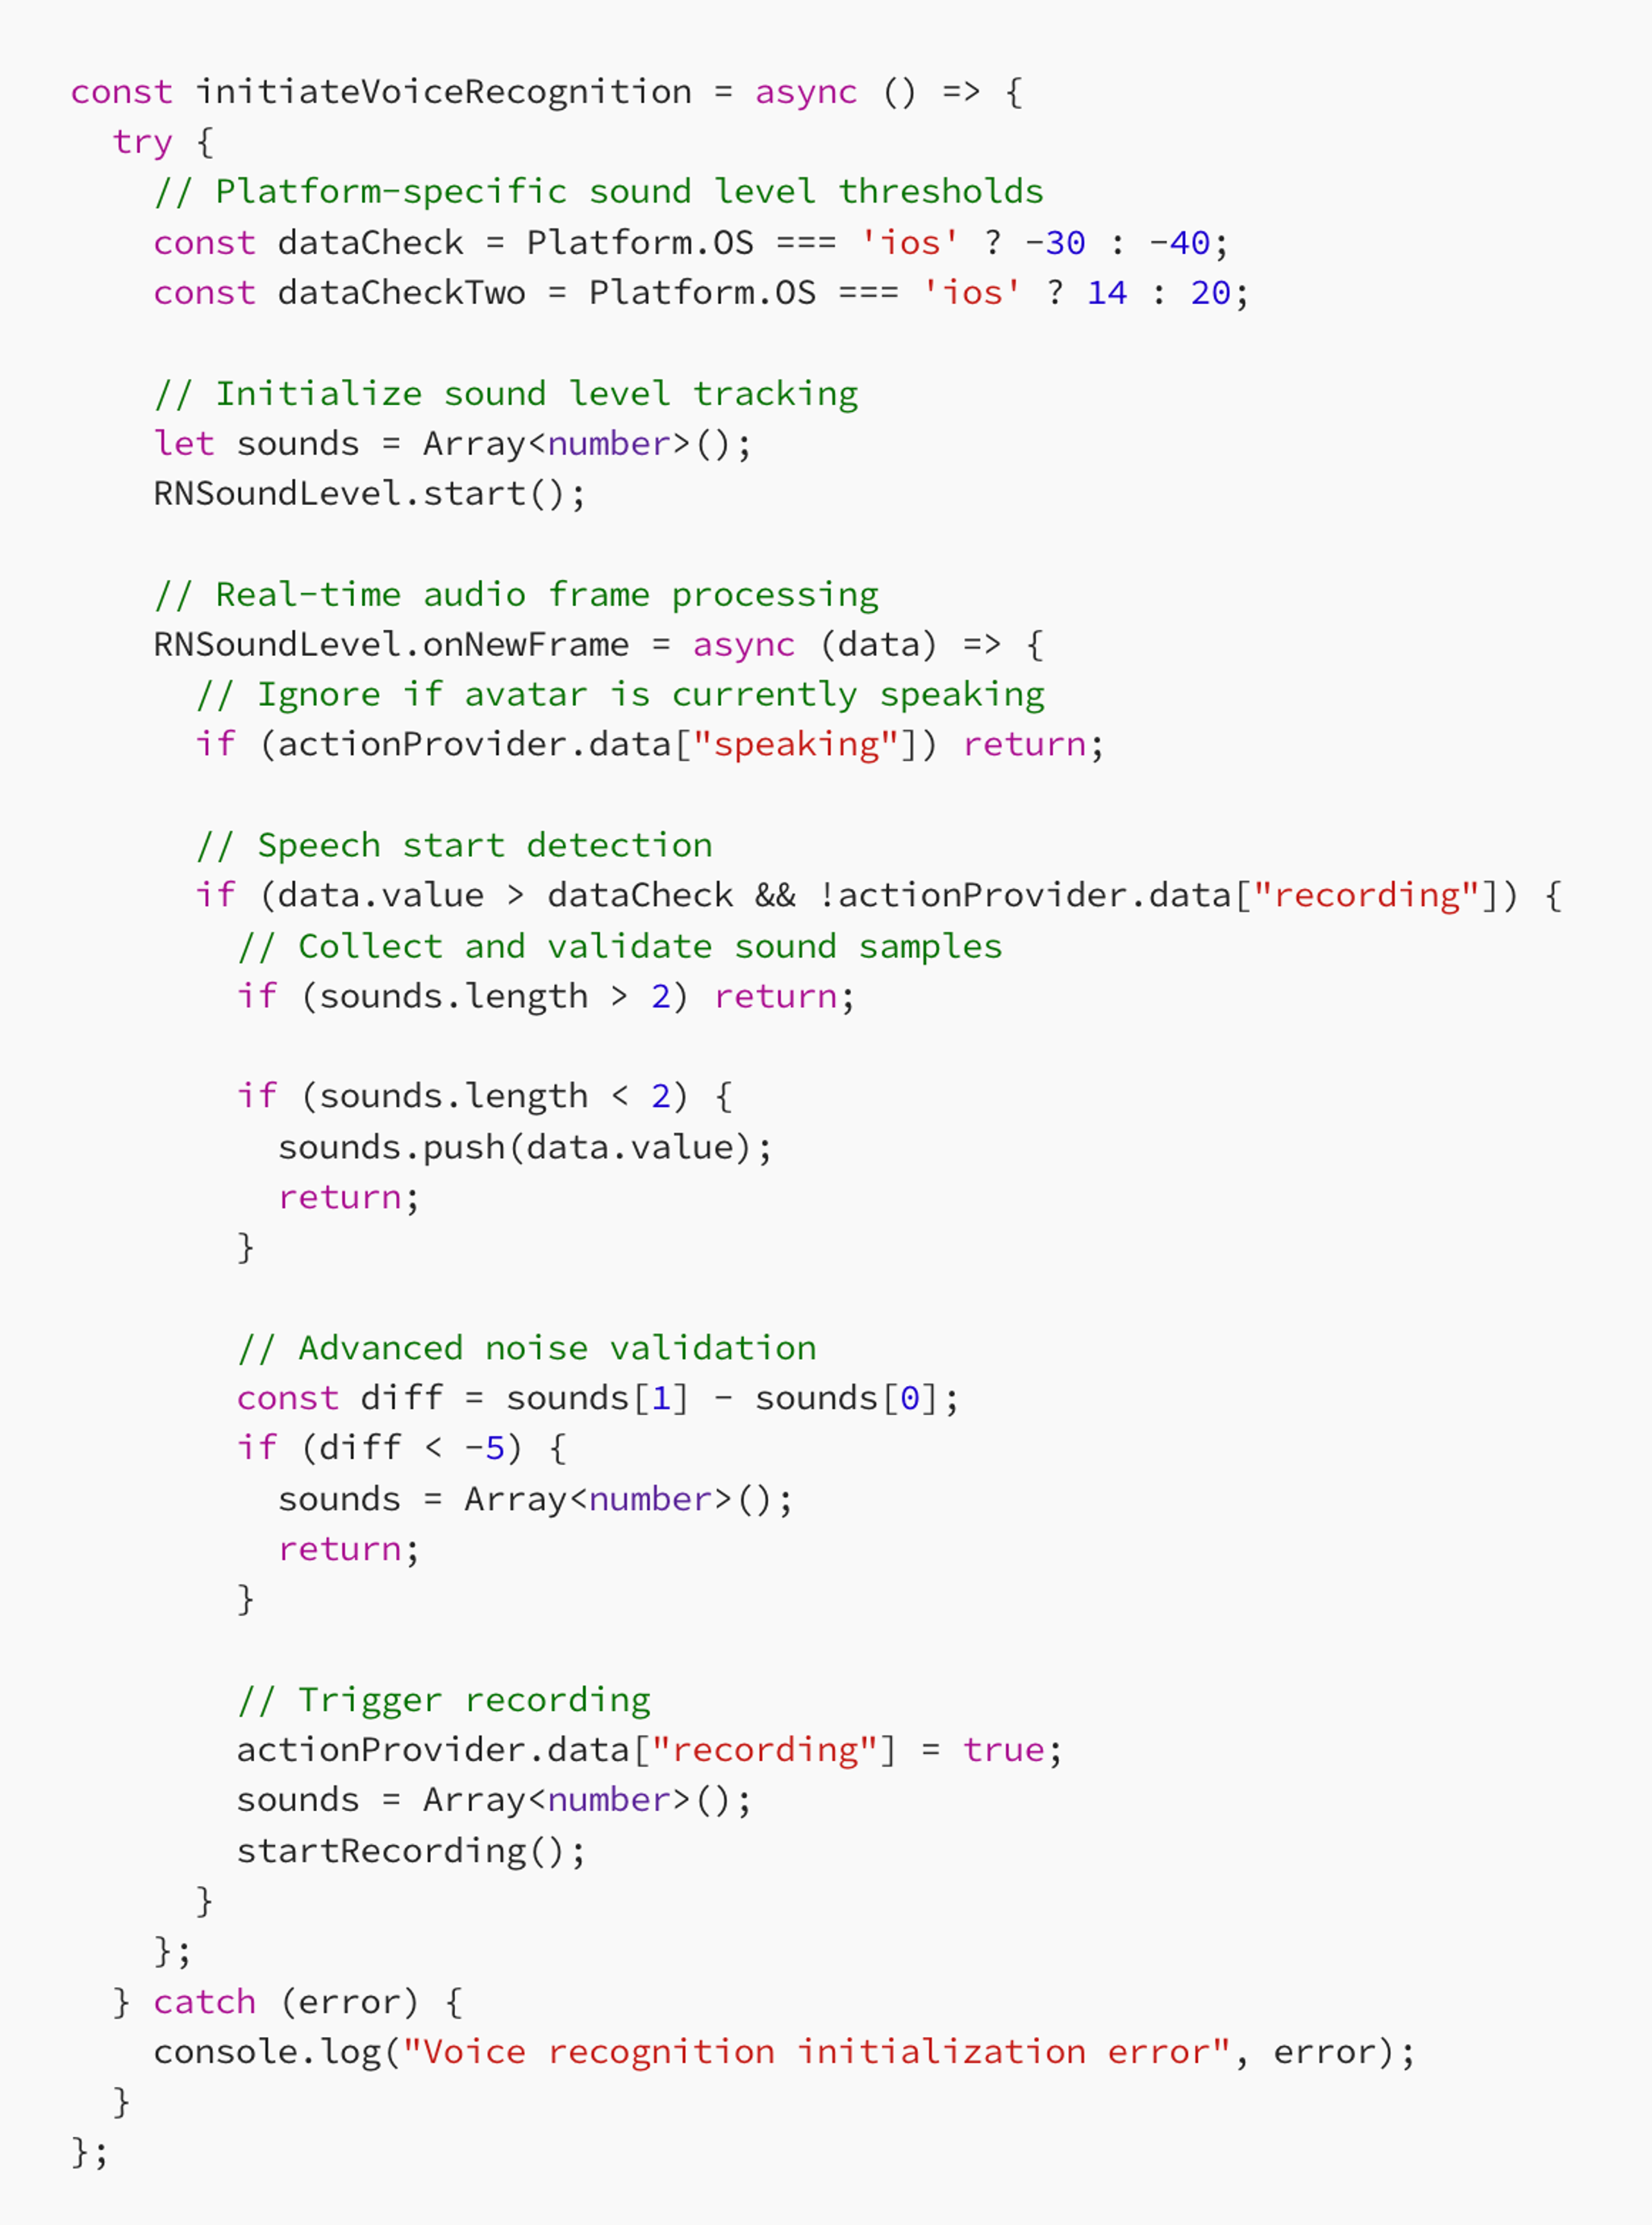
In our initiateVoiceRecognition, we have a threshold value based on the platform you are using in order to account for differences in microphone sensitivity which are dataCheck and dataCheckTwo . These values are hard-coded. We mentioned that as an improvement, these hard coded values can be found using a analysis engine where we analyse the sound level in the surrounding environment and determine these two values.
Once we initialise these values, we start the sound level function as RNSoundLevel.start() . This will allow us to constantly monitor the sound level around the users device and get real-time sound level updates.
The voice detection logic is as follows:
- Start recording: When the noise level exceeds
dataCheckand we are not already recording, we consider that the user has started talking and therefore start recording the users voice. However, we collect a few data points to confirm and then we call thestartRecording()function. - Stop recording: While recording, if we detect a sustained level of low noise levels (silence), we consider that the user has stopped talking and therefore call the
stopRecordingfunction.
We use a helper function in order to determine whether the user has stopped talking or continuous to talk.
Helper function
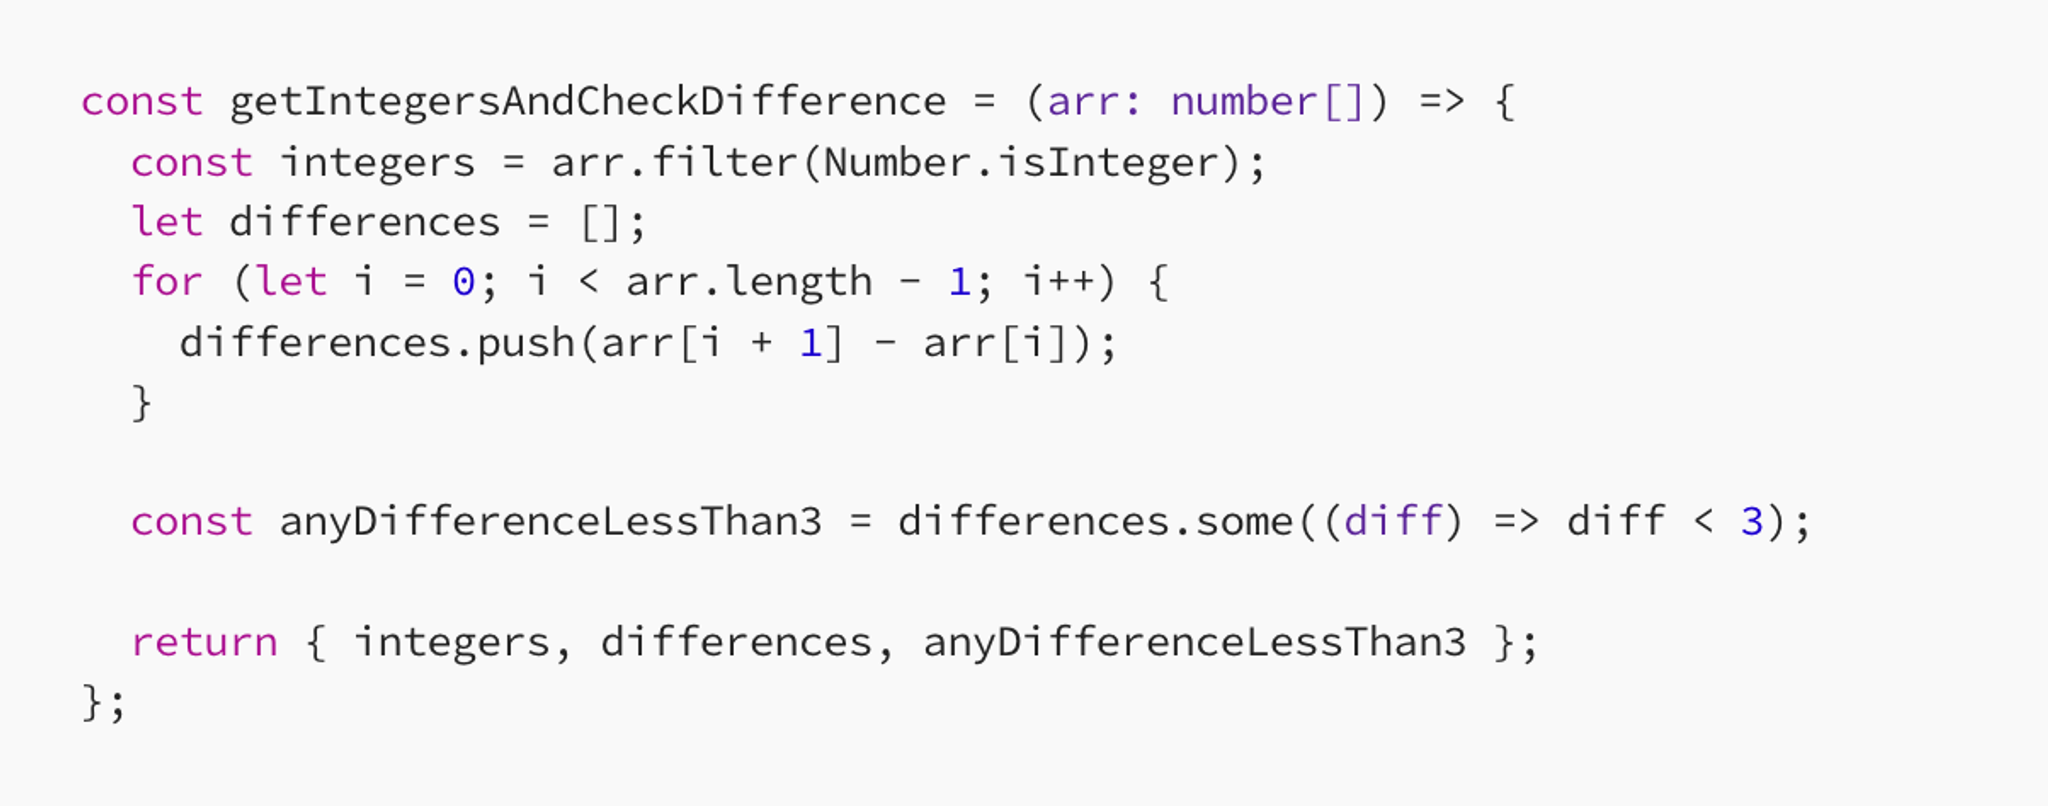
In this helper function, we analyse an array of numbers in order to determine if there is a significant change in these values indicating silence or continued speech.
When the user is speaking, we get data points that are much more than three inside of an array. When the user has stopped talking then the array has fewer than three data points which we can compare against as such diff < 3.
Starting the Recording
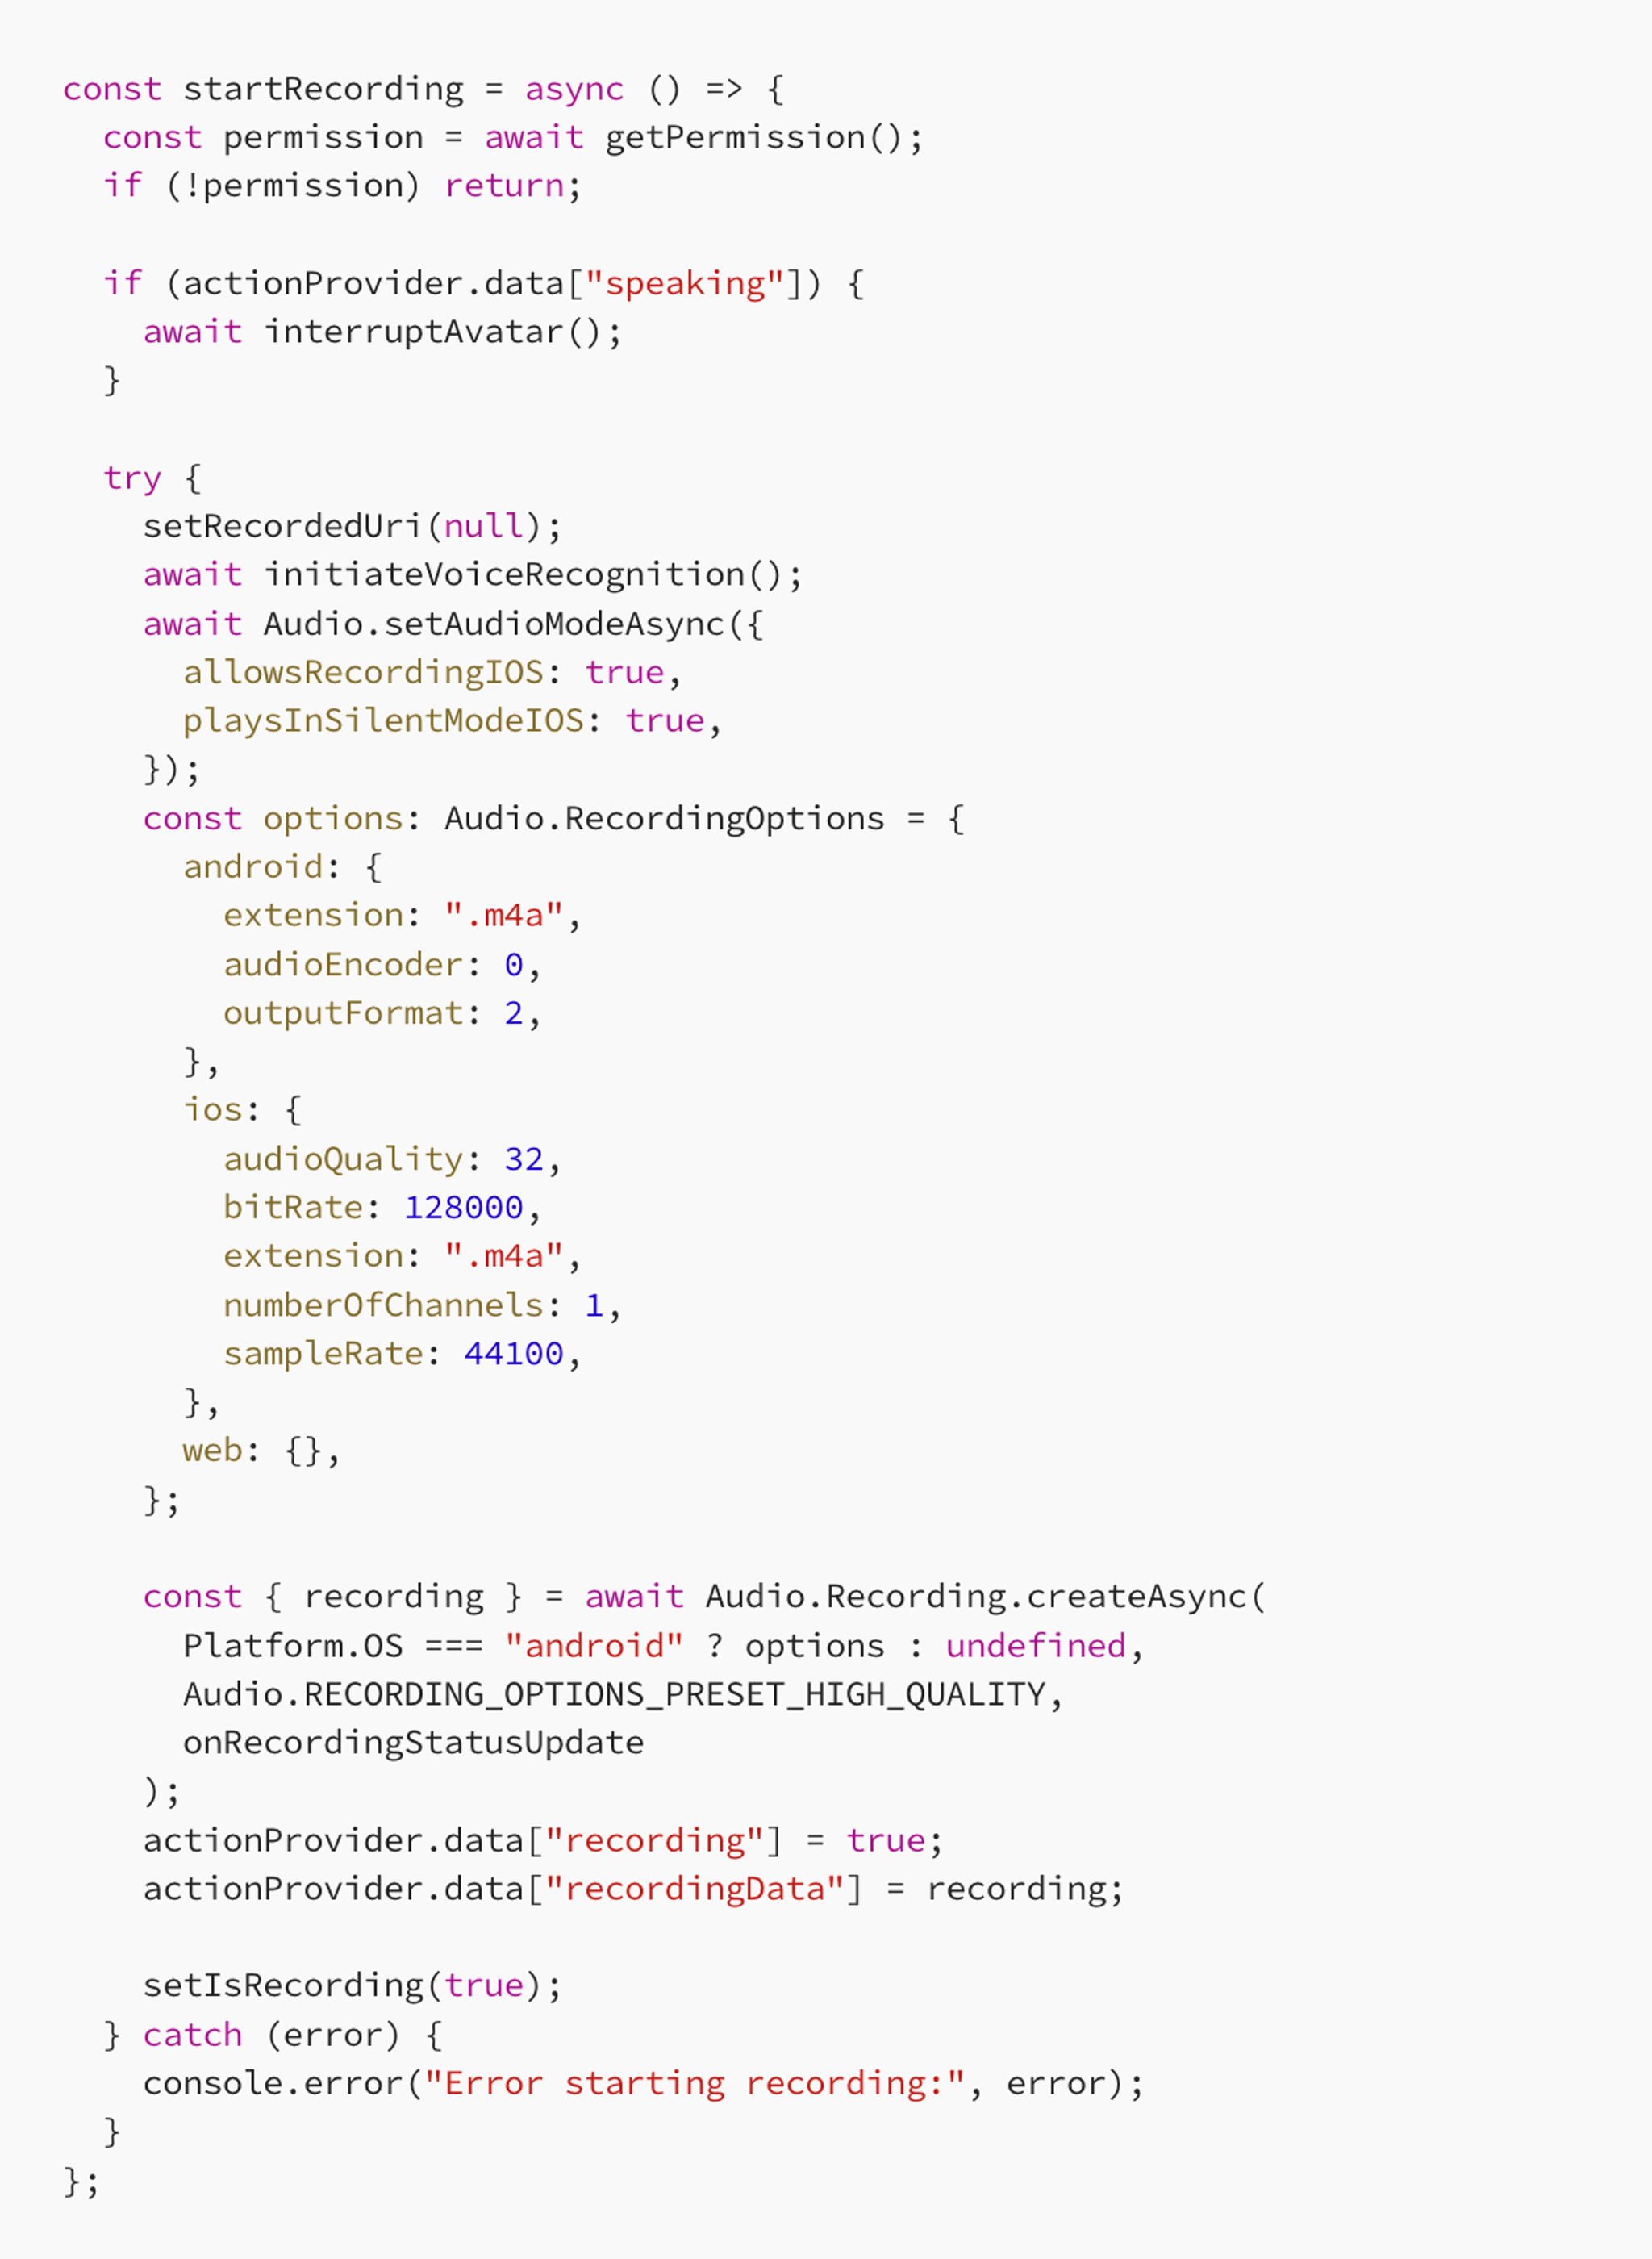
In the above startRecording function we do the following:
- Permission Check: Ensures the app has microphone access.
- Audio Mode Configuration: Sets the audio mode to allow recording and playback in silent mode.
- Recording Options: Specifies the recording format and quality based on the platform.
- Recording Start: Begins recording and updates the state accordingly.
Stopping the Recording
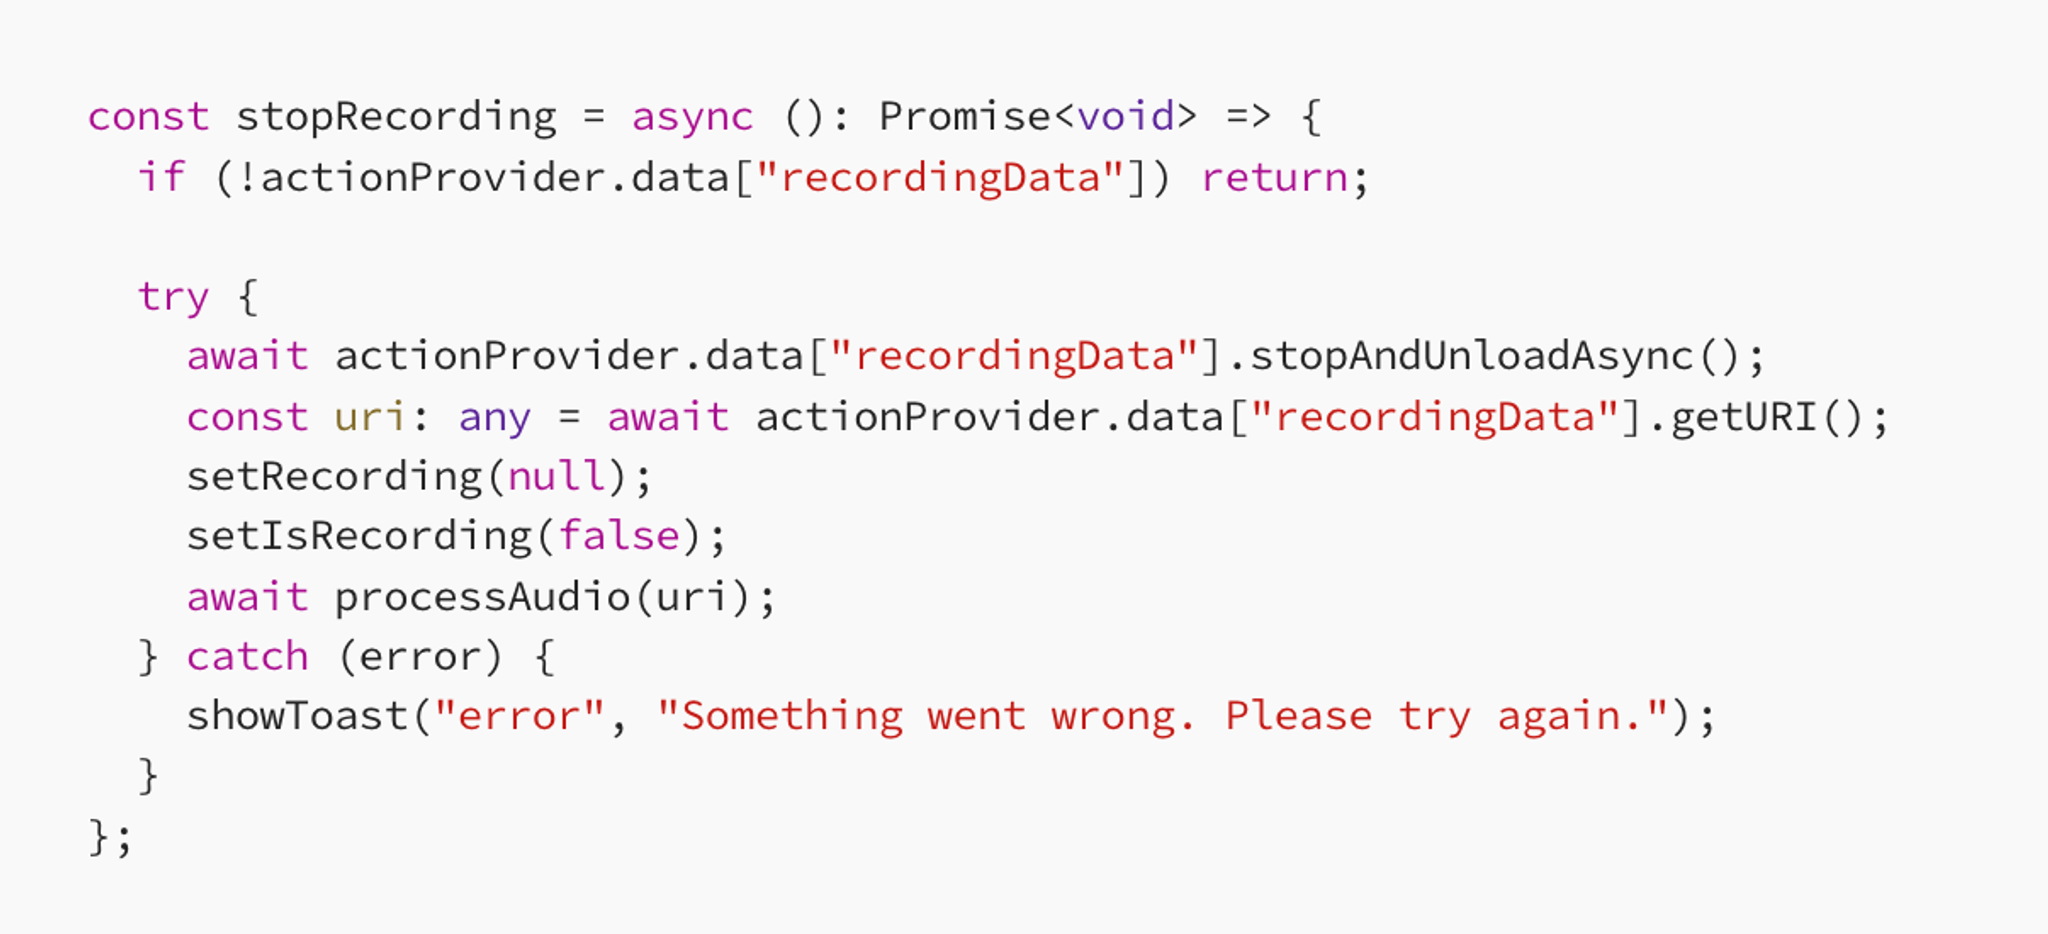
In the stopRecording function, we do the following:
- Recording Stop: Stops the current recording session.
- Audio Processing: After stopping, we proceed to process the recorded audio.
When we stop recording, we then process the audio and send it to the backend.
Audio Processing
In processing the audio, we convert it into base64 format and send it to the backend. Along with processing the audio, we also manage the session by handling any potential errors such as insufficient quota or session termination.
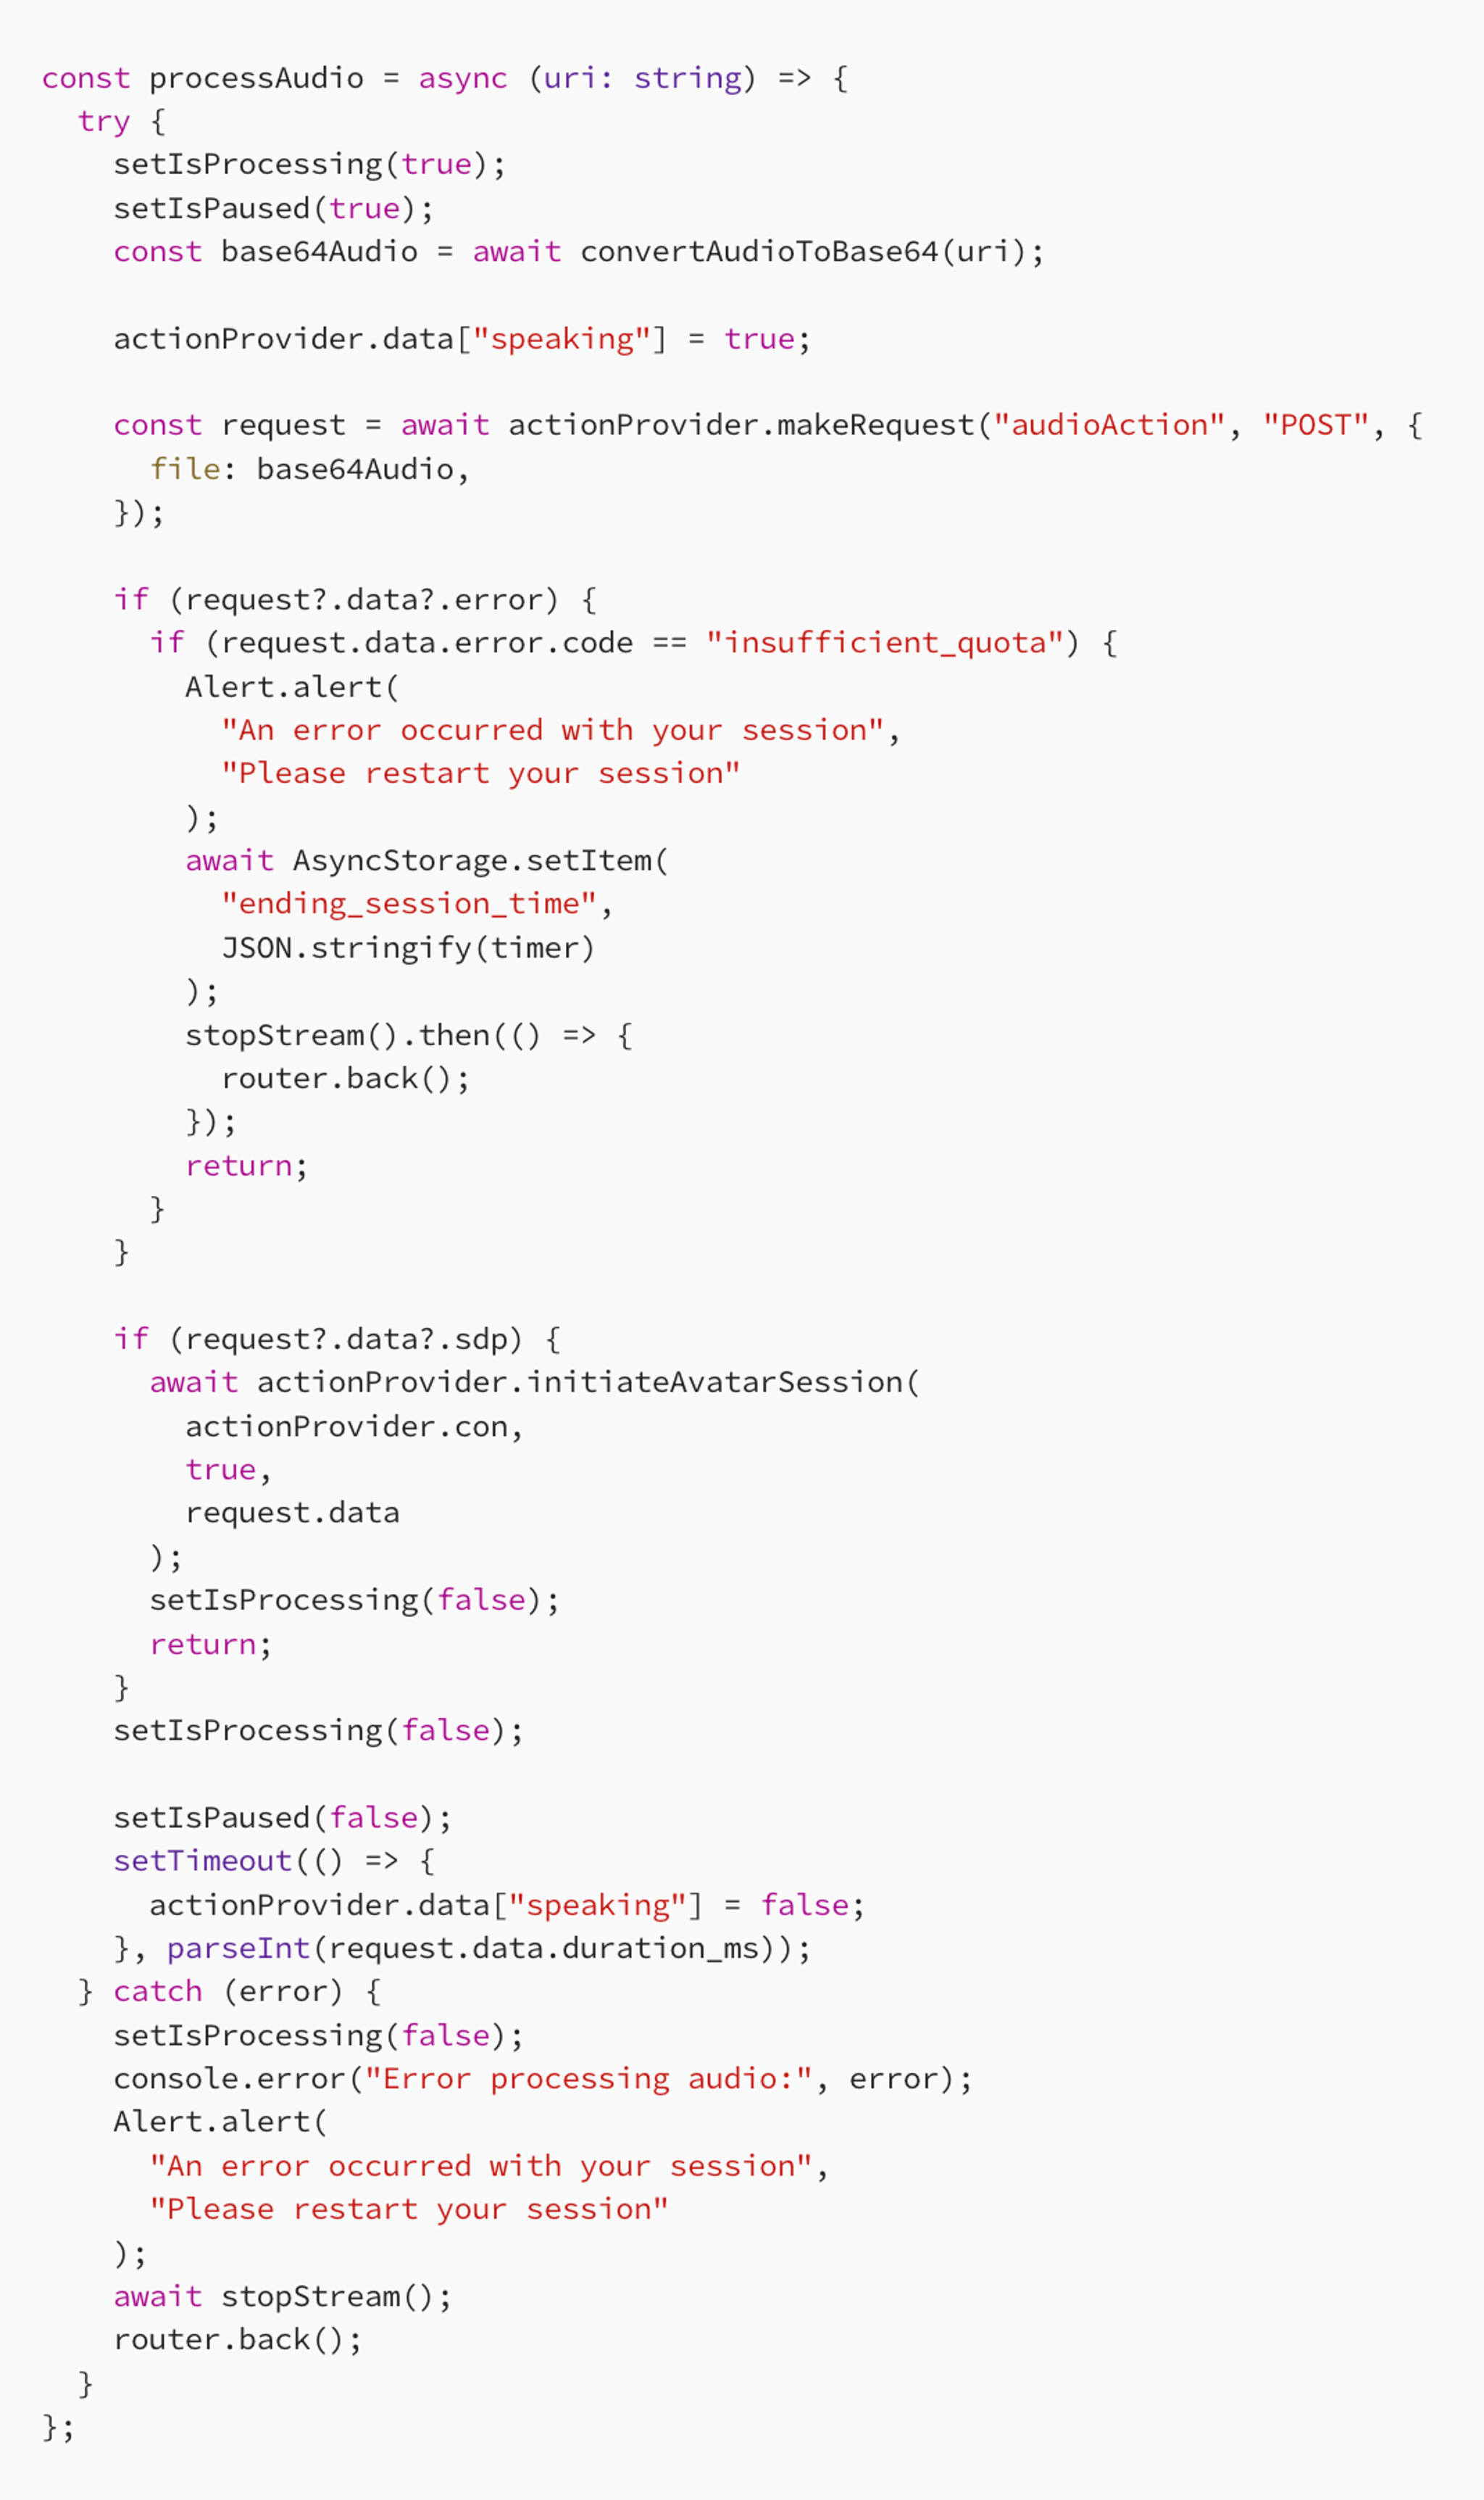
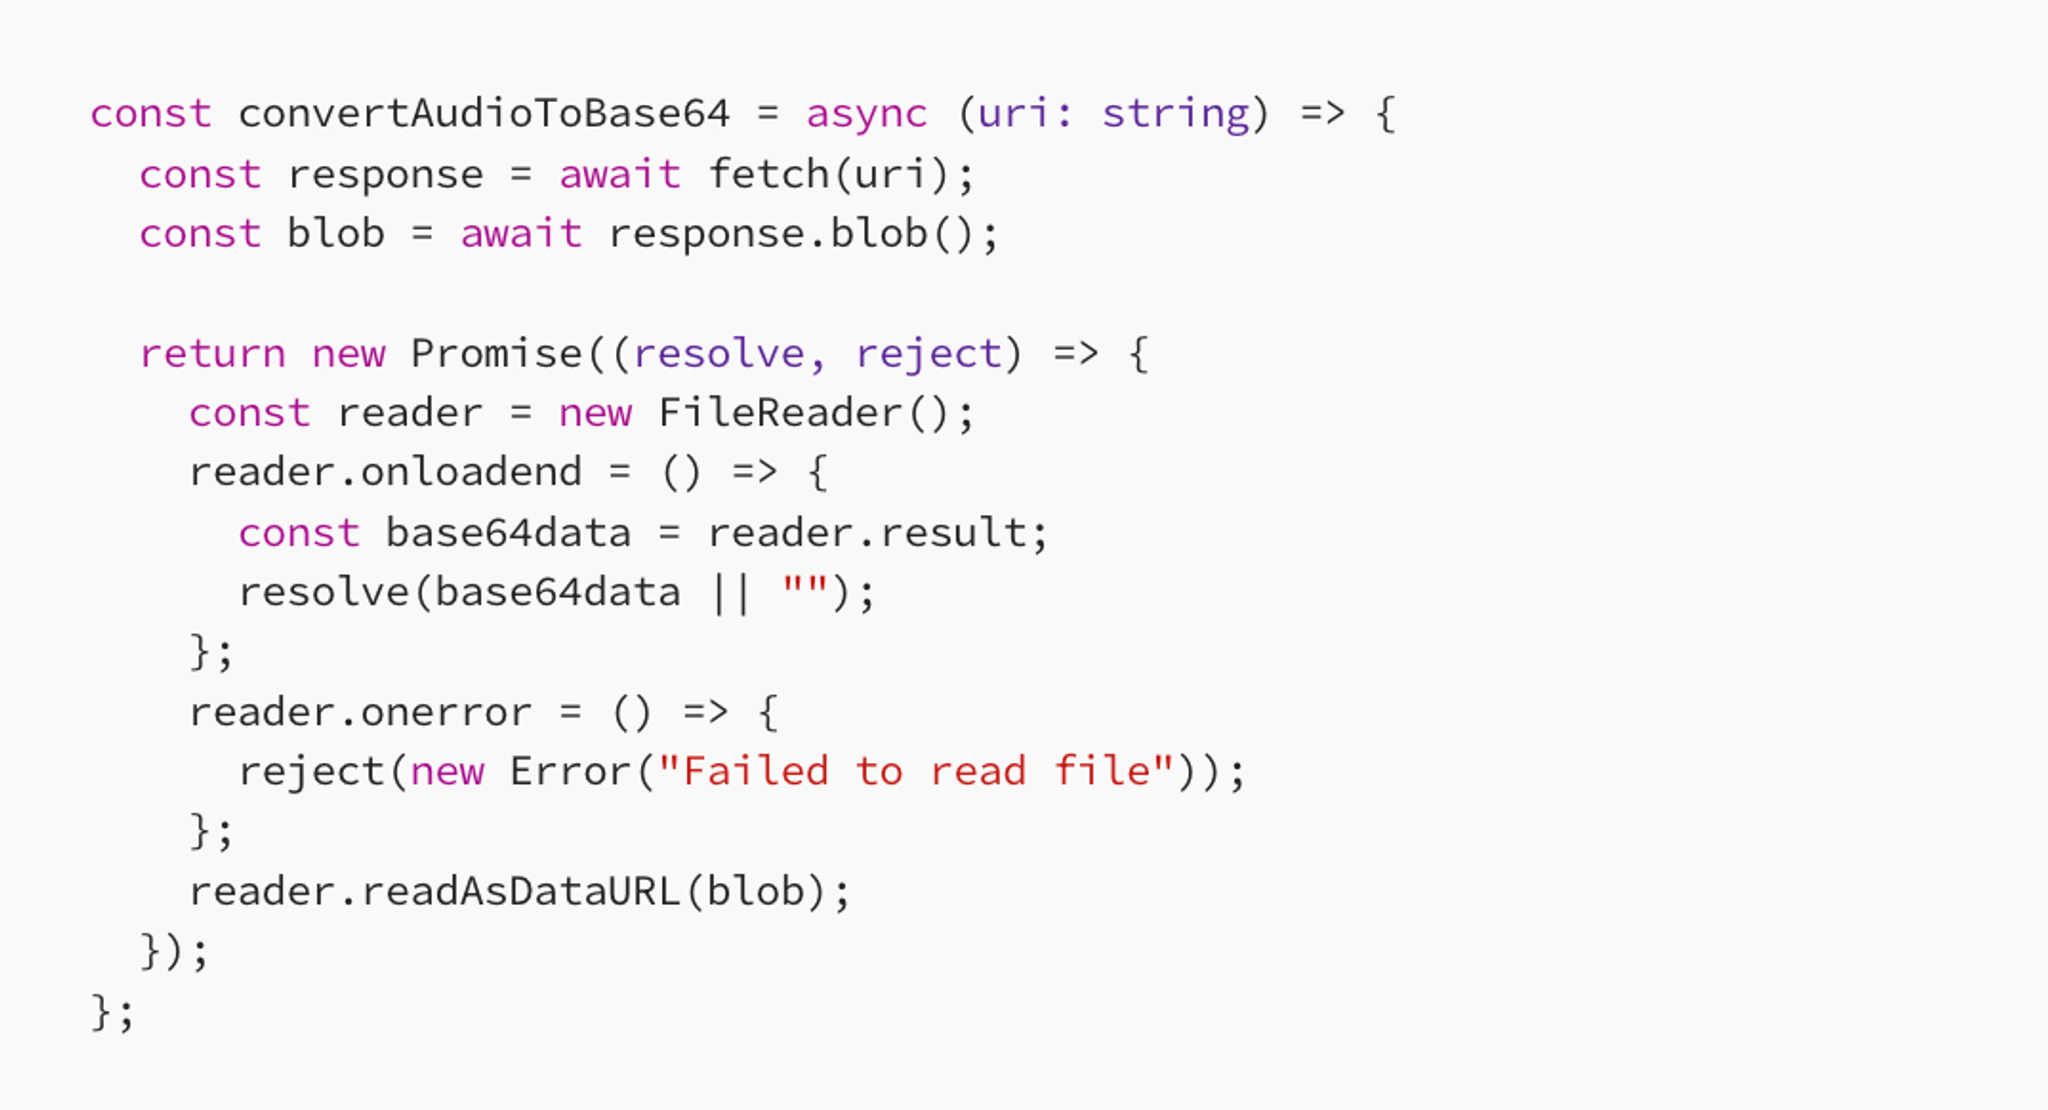
We use a helper function in order to change the audio which is being processed to base64. We input the URI into the convertAudioToBase64 function and then send it to the backend which transcribes the audio, inputs the transcribed text into chatGPT for a response and then sends it back to the user.
Clean-up and user interaction
You want to make sure that the audio resources are properly managed to prevent memory leaks or any unexpected behaviour.
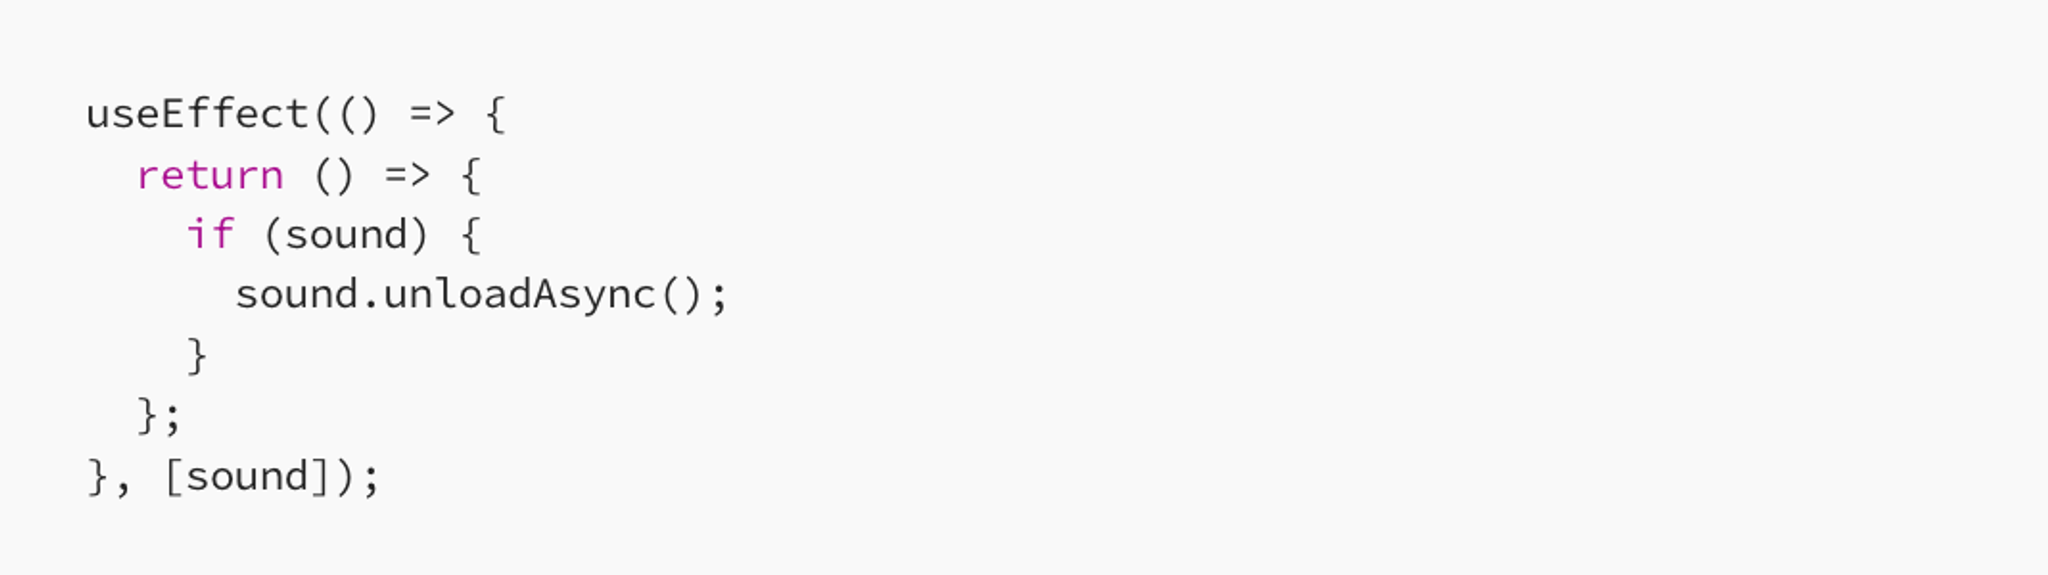
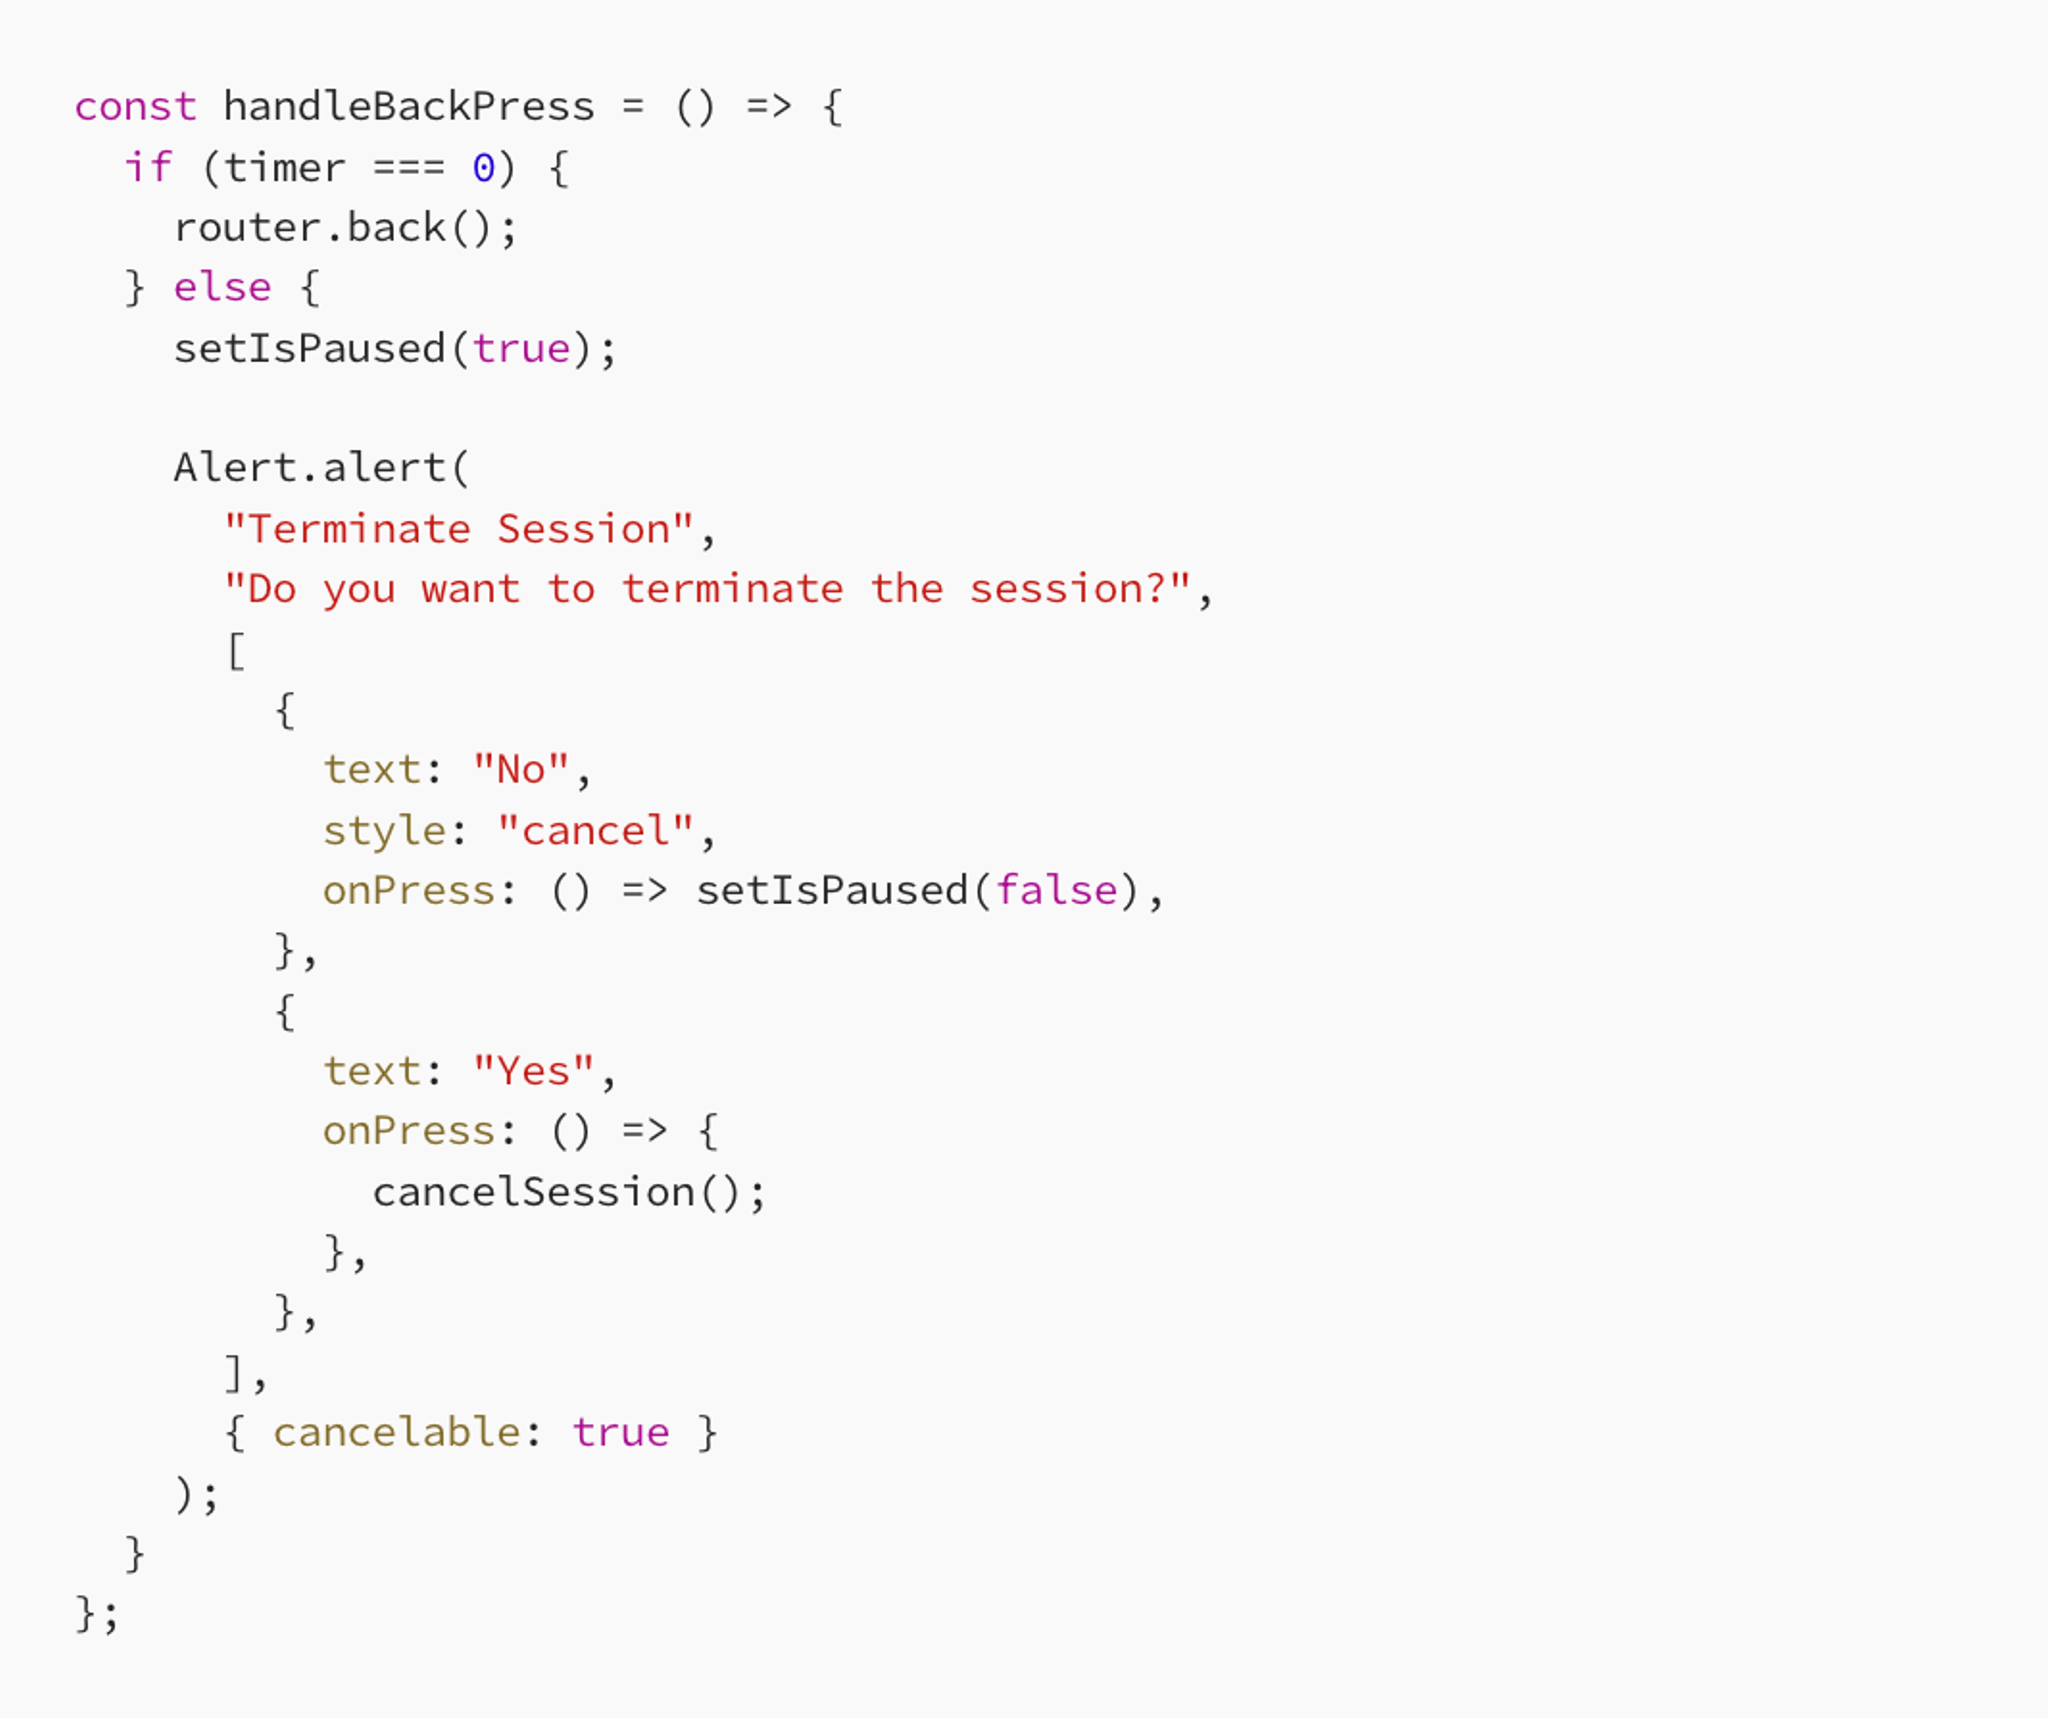
When the component unmounts, unload any loaded sound resources. If the user wants to terminate the session with his therapist, we provide a handle back button which terminates the session.
Conclusion
To conclude this blog post, we have spoken about real-time voice recognition in a React Native mobile application. This involves various aspects like session initiation, noise level monitoring based on hard-coded values and audio processing. By leveraging React Native and several libraries, we created a seamless voice interaction experience. The key lies in monitoring and detecting noise levels in the users environment and managing recordings accordingly.
This approach not only enhances user engagement but it also opens the door to crafting more interactive and accessible application.